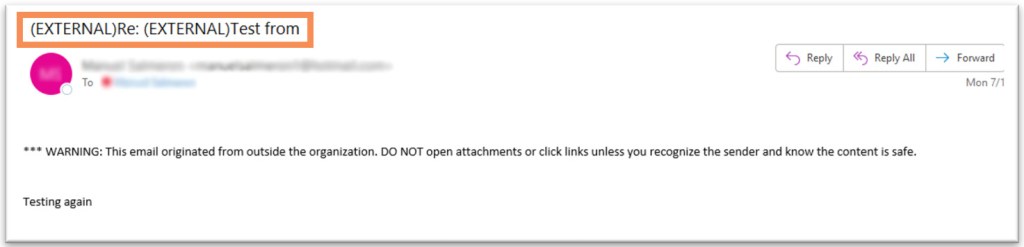
Up until now, you have probably been using Transport Rules to prepend the subject line of messages received from outside your organization with the word EXTERNAL. This has worked fine in the past but with every reply, another EXTERNAL is added to the subject line. This can cause an extremely long subject line and can get confusing to read.
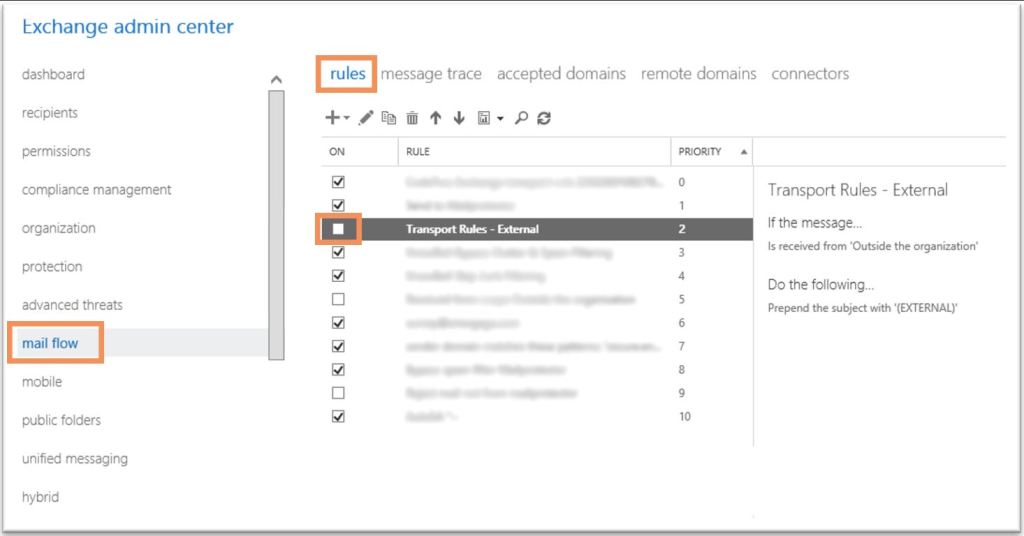
Today, we’ll be walking through enabling the Microsoft native external sender identification tag for Exchange Online. The first thing we need to do is disable any existing Transport Rules to avoid duplicate warnings.
Login to Exchange Admin Center
Click Mail Flow>Rules and uncheck the existing Transport Rule. Wait 30 minutes before moving on the next step
Enable External Sender Identification Tag
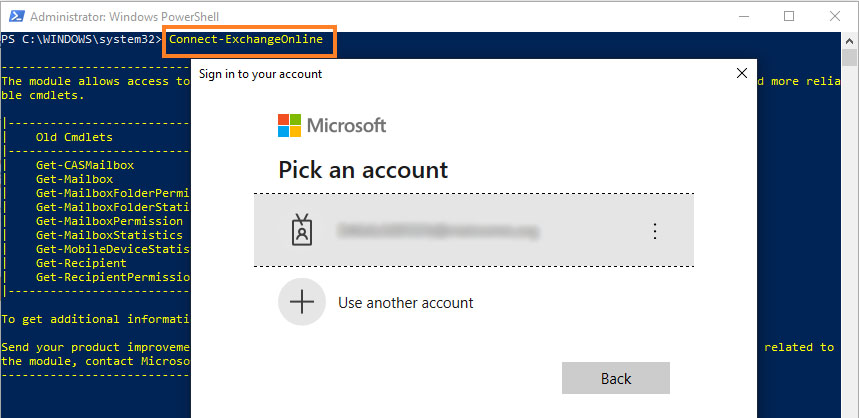
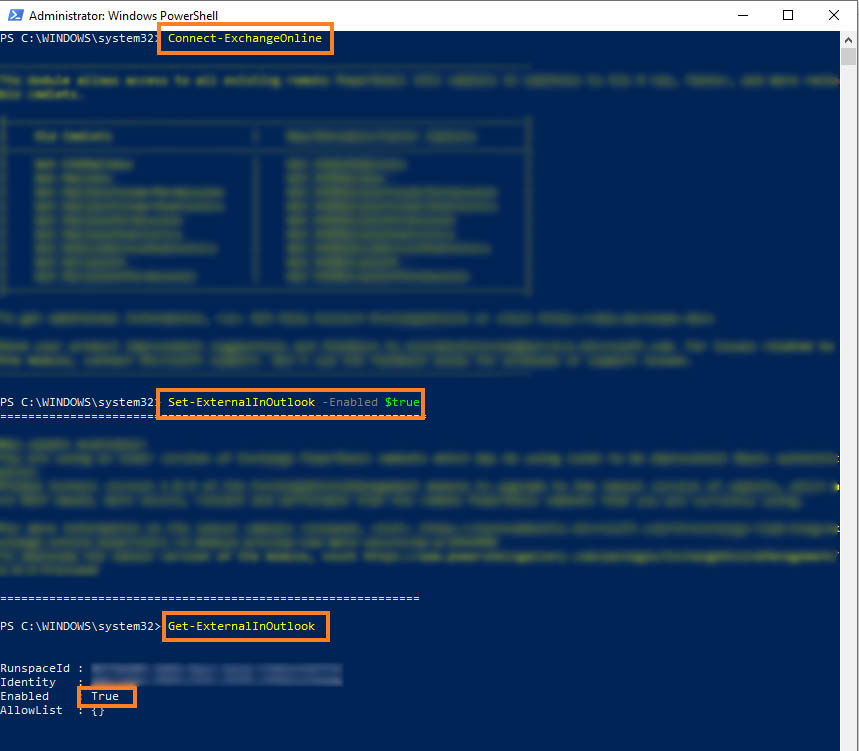
Firstly, we need to connect to the Exchange Online module
Type Connect-ExchangeOnline in PowerShell
Login with an account that has the Exchange Administrator permissions
Next, type Set-ExternalInOutlook -Enabled $true
To verify the setting changed, type Get-ExternalInOutlook
It can take anywhere from 24-48 hours before the External icon message appears in Outlook.
End Result
Here is the result of enabling external sender identification on the Outlook desktop app. As you can see, if you click on the message you will also get an easy way to block the sender.

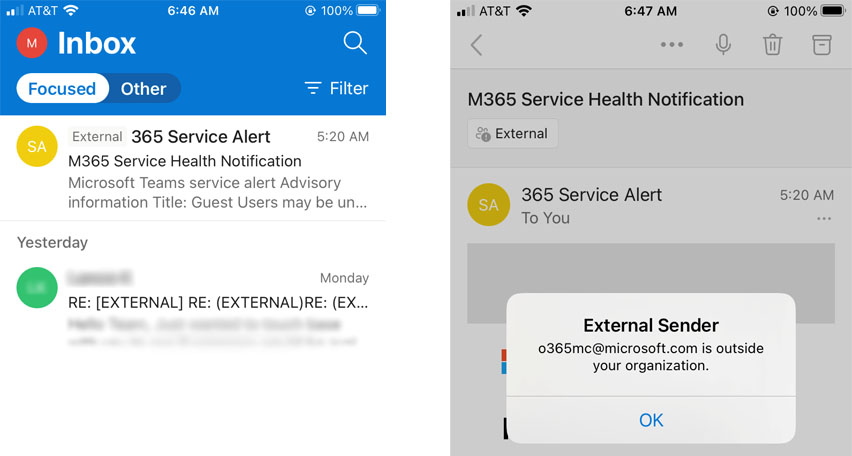
Here is the result on a mobile device. On the left, you can see the External tag in the latest email. Look at the email below for how it previously looked with Transport Rules.
On the right, if you open the email and click on the External tag, you will be shown the following message.
Adding to Allow List
You can add individual domains (freshtips.tech), domain and subdomains (*.freshtips.tech), or email addresses (manny@freshtips.tech) to the Allow List.
To add multiple values, separate with a comma. For example:
Set-ExternalInOutlook -AllowList manny@freshtips.tech,admin@freshtips.tech
In this example, we see how to add and remove at the same time
Set-ExternalInOutlook -AllowList @{Add=”manny@freshtips.tech”; Remove=”admin@freshtips.tech”}
For more information, visit Microsoft
 FreshTips