Summary
This post will describe the steps for integrating Meraki Client VPN with Microsoft Entra ID multi-factor authentication (MFA). To enable MFA on a Meraki VPN connection, we will walk through setting up a Network Policy Server (NPS), configuring Remote Authentication Dial-in User Service (RADIUS) policies, and adding the NPS extensions for Azure. The NPS extension for Azure will allow us to safeguard RADIUS client authentication by adding an extra layer of security in two-step verification for users attempting to connect to your network using VPN.
Authentication Flow
Courtesy: Microsoft
When the NPS extension for Azure is integrated with the NPS, a successful authentication flow results, as follows:
- The VPN server (Meraki MX) receives an authentication request from a VPN user that includes the username and password for connecting to a resource, such as a Remote Desktop session.
- Acting as a RADIUS client, the VPN server (Meraki MX) converts the request to a RADIUS Access-Request message and sends it (with an encrypted password) to the RADIUS server where the NPS extension is installed.
- The username and password combination is verified in Active Directory. If either the username or password is incorrect, the RADIUS Server sends an Access-Reject message.
- If all conditions, as specified in the NPS Connection Request and Network Policies, are met (for example, time of day or group membership restrictions), the NPS extension triggers a request for secondary authentication with Microsoft Entra multifactor authentication.
- Microsoft Entra multifactor authentication communicates with Microsoft Entra ID, retrieves the user’s details, and performs the secondary authentication by using the method that’s configured by the user (cell phone call, text message, or mobile app).
- When the MFA challenge is successful, Microsoft Entra multifactor authentication communicates the result to the NPS extension.
- After the connection attempt is both authenticated and authorized, the NPS where the extension is installed sends a RADIUS Access-Accept message to the VPN server (RADIUS client or Meraki MX).
- The user is granted access to the virtual port on the VPN server and establishes an encrypted VPN tunnel.
Prerequisites
- Build a Windows Server and add the Network Policy and Access Services role to the server. The role can be added through the Add Roles and Features wizard in Server Manager.
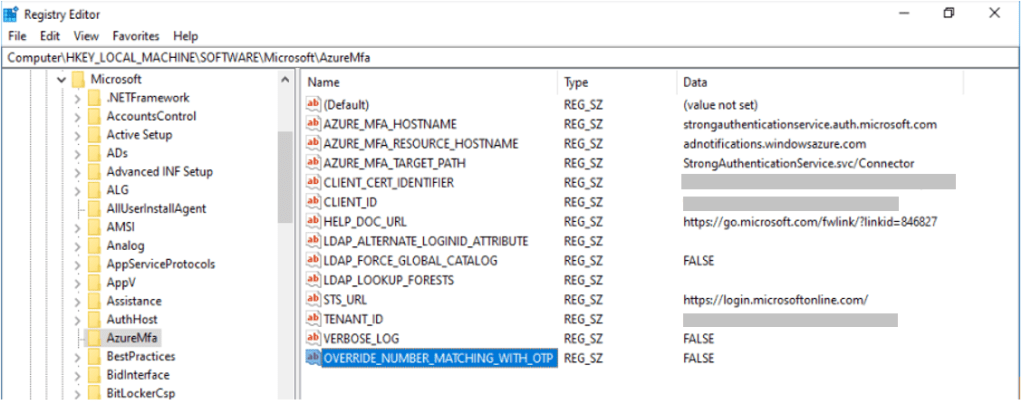
- If your organization uses a VPN and the user is registered for a TOTP code along with Authenticator push notifications, the user can’t meet the MFA challenge and the remote sign-in fails. In that case, you can set OVERRIDE_NUMBER_MATCHING_WITH_OTP = FALSE to fallback to push notifications to Approve/Deny with Authenticator. This is case sensitive, make sure to use all caps.
For an NPS extension to continue working for VPN users, this registry key must be created on the NPS server. On the NPS server, open the registry editor. Navigate to:
HKEY_LOCAL_MACHINE\SOFTWARE\Microsoft\AzureMfa
Create the following String/Value pair:
Name: OVERRIDE_NUMBER_MATCHING_WITH_OTP
Value = FALSE
Register Server in Active Directory
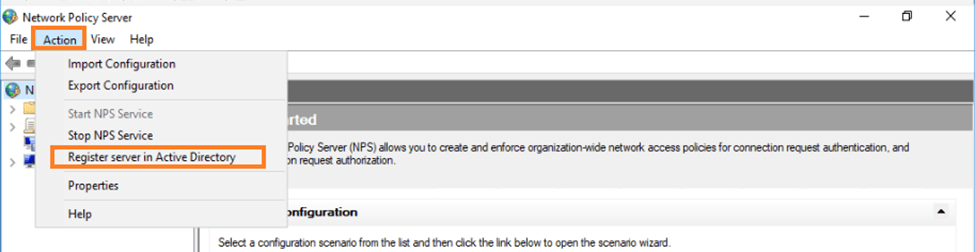
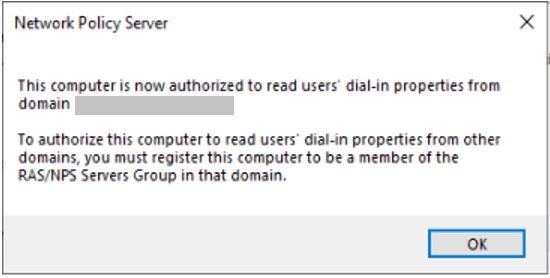
To function properly and to give the NPS server the ability to read user properties in AD, we need to register the NPS server with AD.
Within Network Policy Server, click Action and select Register server in Active Directory
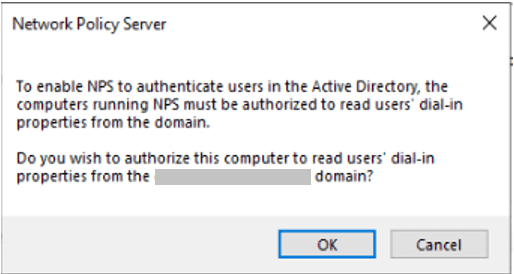
Click OK to confirm
Click OK
Configure RADIUS
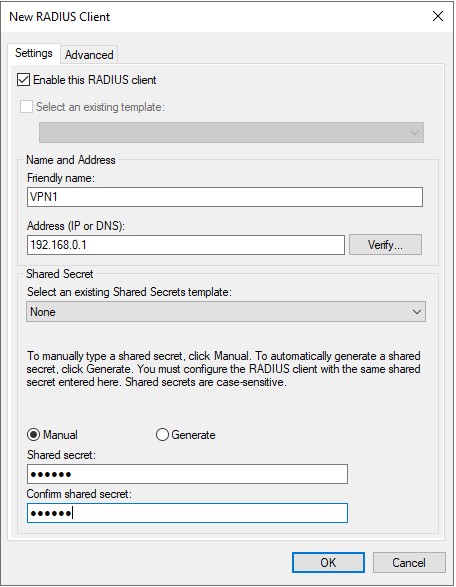
For the Meraki MX to act as an authenticator for RADIUS, it must be added as a client on NPS.
- Open the NPS Server Console by going to Start > Programs > Administrative Tools > Network Policy Server.
- In the Left pane, expand the RADIUS Clients and Servers option.
- Right-click the RADIUS Clients option and select New.
- Enter a Friendly Name for the MX Security Appliance: VPN1
- Enter the internal IP Address of the MX Security Appliance (Default Gateway): 192.168.0.1
On a local subnet – Use the IP address of the MX/Z1 on the subnet shared with the RADIUS server.
Over a static route – Use the IP address of the MX/Z1 on the subnet shared with the next hop.
Over VPN – Use the IP address of the MX/Z1 on the highest-numbered VLAN in VPN.
- Create and enter a RADIUS Shared Secret (make note of this secret – we will need to add this to the Dashboard): secret
Note: Currently only ASCII characters are supported for RADIUS shared secrets – Unicode characters will not work correctly.
- Click OK
Configure a RADIUS Connection Request
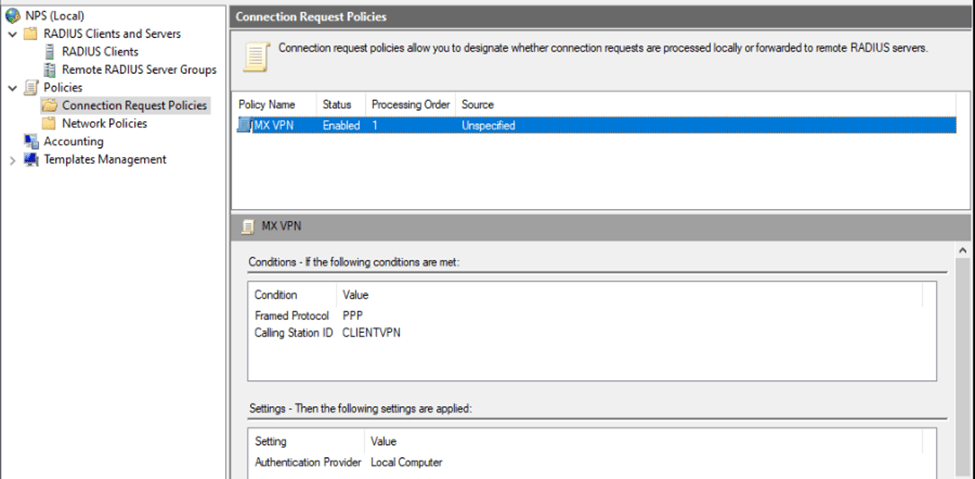
- In the NPS Server Console, navigate to Policies > Connection Request Policies. Right-click the Connection Request Policies folder and select New.
- In the Connection Request Policy Wizard, enter a Policy Name and select the Network Access Server Type unspecified then press Next.
- Click Add to add conditions to your policy.
Access Request messages will need to meet these conditions to be allowed access.
- From the list of conditions select the option for Framed-Protocol. Press Add and place a check next to the PPP option then press Ok.
- Click Add to add another condition and select the option for CallingStationID. Enter CLIENTVPN into the text box and press Next.
- On the next three pages of the wizard, we will leave the default settings. Press Next on these pages to continue.
- Review the settings then press Finish.
Configure a RADIUS Network Policy
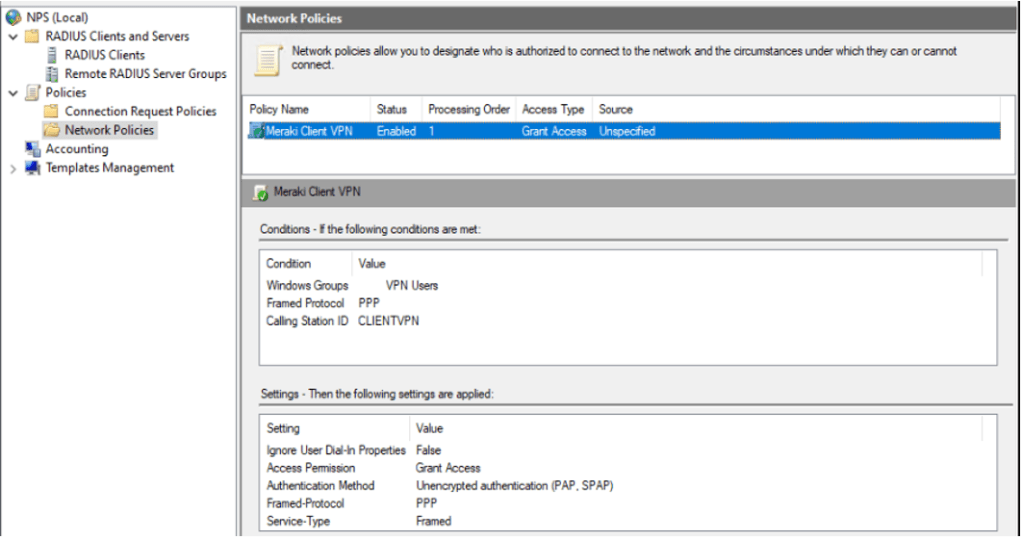
- In the Left pane of the NPS Server Console, right-click the Network Policies option and select New.
- In the Network Policy Wizard enter a Policy Name and select the Network Access Server type unspecified then press Next.
- Click Add to add conditions to your policy.
- From the list of conditions, select the option for Windows Groups. Click Add Groups and enter the name of Windows Group you would like to give Client VPN permission: Company\VPN Users
- Click Add to add an additional condition. Select the option for Framed Protocol, press add and check the PPP option then press Ok
- Click Add to add a final condition. Select the option for CallingStationID. Enter CLIENTVPN into the text box and press Next.
Note: Some versions of Windows Server require that the CallingStationID is omitted. If you are unable to establish connectivity, remove the CallingStationID and leave the field blank.
- Leave the default settings on the Specify Access Permission page and press Next.
- Deselect all checkboxes and select Unencrypted authentication (PAP, SPAP). An informational box will be displayed press No to continue and press Next
- The next 2 pages of the wizard, we will leave the default settings. Press Next on these pages to continue.
- Review the settings then press Finish.
Meraki Dashboard Configuration
Log onto the Meraki Dashboard and navigate to Security & SD-WAN > Configure > Client VPN
Select RADIUS as the Authentication method.
Click the Add a RADIUS Server link.
Enter your RADIUS Host IP Address: 192.168.0.1
Enter the RADIUS Port that the MX Security Appliance will use to communicate to the NPS server. The default port is 1812.
Enter the RADIUS Shared Secret (established when the MX was added as an authenticator): secret
RADIUS timeout should be set to 60 seconds to allow time for user approval in the Authenticator app
Click Save changes.
Client Configuration
Installation of additional software is not required on client devices. The Cisco Meraki Client VPN solution uses L2TP over IPsec, which is supported by almost all device’s built-in native clients.
Test VPN Connectivity
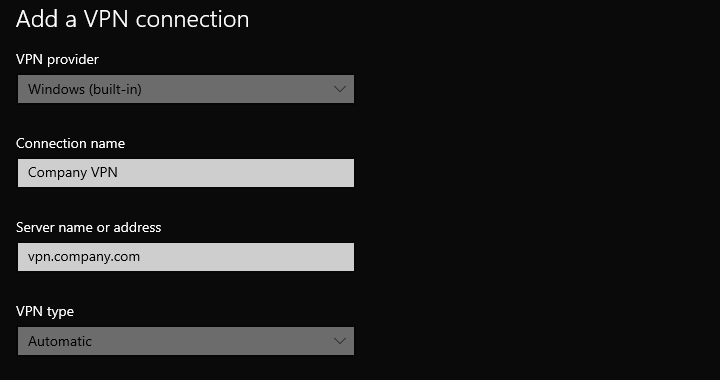
On a Windows 10 device, open Settings > Network & Internet > VPN and click Add a VPN connection
Add the following settings below:
VPN provider: Windows (built-in)
Connection name: Company VPN
Server name or address: Public IP address of Meraki MX or FQDN
VPN type: Automatic
Click Save
Open the Network and Sharing Center and select Change adapter settings
Right-click the VPN network connection, and select Properties
In the VPN properties, select the Security tab
For Type of VPN, select Layer 2 Tunneling Protocol with IPsec (L2TP/IPsec)
Click Advanced settings and select Use preshared key for authentication and type the key: secret
Click OK
For Data encryption, select Optional encryption (connect even if no encryption)
Click Allow these protocols and check the box Unencrypted password (PAP)
Click OK
Right click the VPN connection and select Connect to verify a successful connection
Install and Configure the NPS Extension for Azure
Download the NPS extension for Azure
Download the NPS extension for Azure
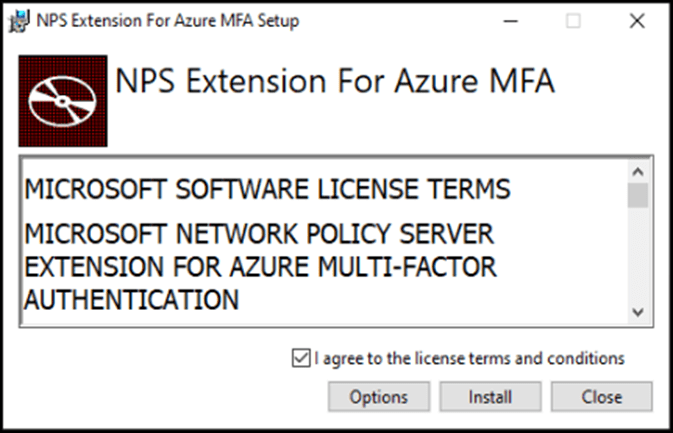
Check the license agreement box and click Install
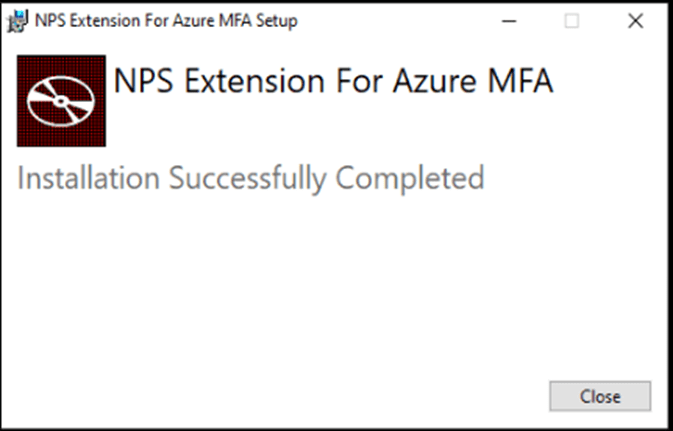
Click Close
Create Self-Signed Certificate
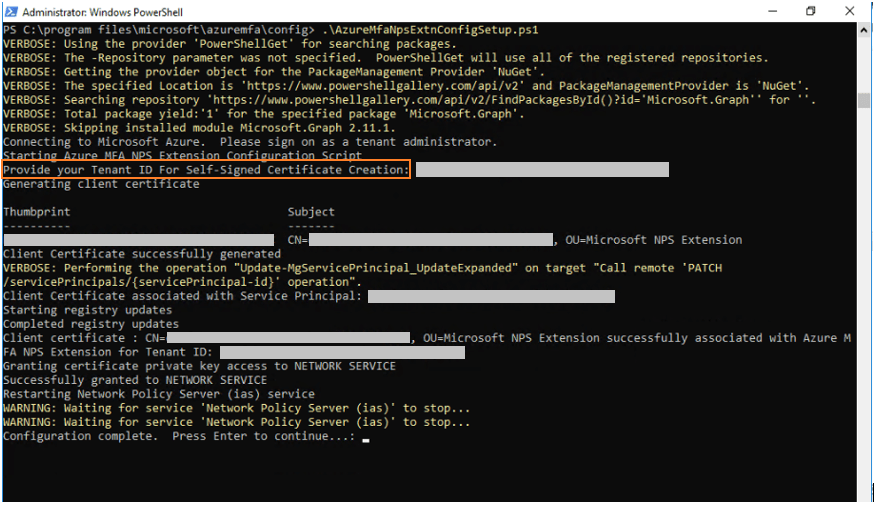
Launch PowerShell as an Administrator and run the following command:
C:\users\admin > cd “c:\Program Files\Microsoft\AzureMfa\Config”
C:\Program Files\Microsoft\AzureMfa\Config > .\AzureMfaNpsExtnConfigSetup.ps1
The script checks to see whether Graph PowerShell is installed. If it is not installed, the script installs Graph PowerShell for you.
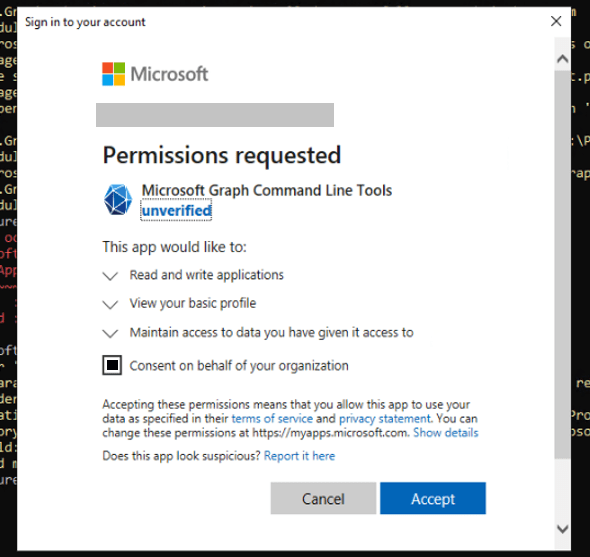
After the script verifies or installs the Microsoft Graph PowerShell module, you will be prompted to enter your Microsoft Entra administrator credentials and password
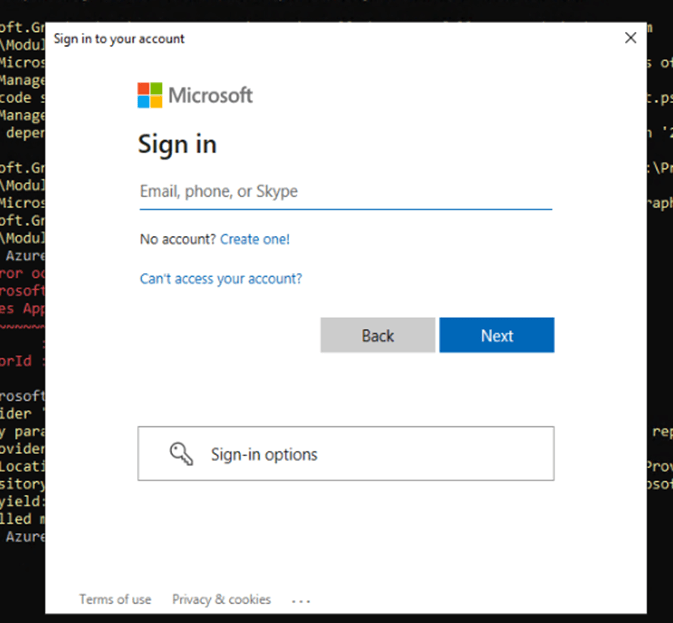
Check Consent on behalf of your organization and click Accept
When prompted, type in the Azure tenant ID
Once complete, reboot the server
Microsoft Authenticator App
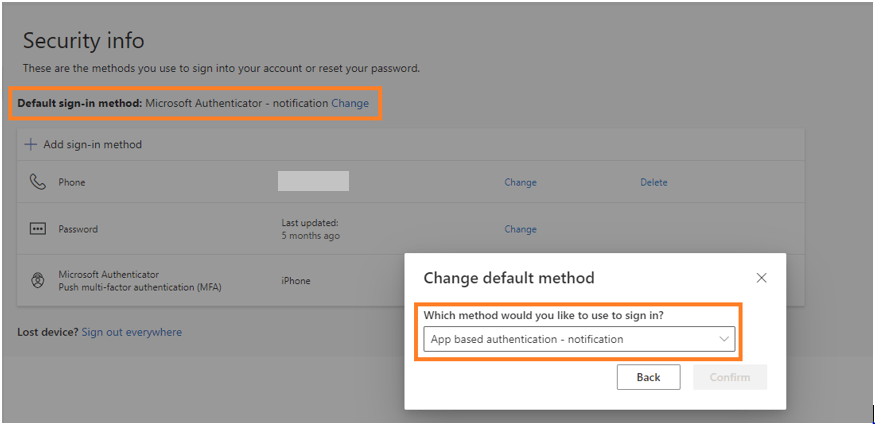
The authentication flow will not work properly if using SMS as the default sign-in method for MFA. Users will need to change the default sign-in method to use the Microsoft Authenticator app for push notifications. Users can change their default sign-in method here: https:\\aka.ms\mfasetup
Verify App based authentication – notification is selected as the default sign-in method
Manage Default Authentication Method for Users
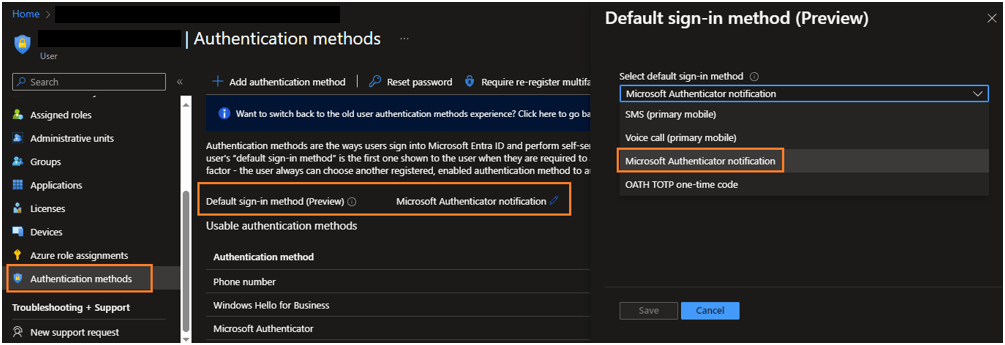
For administrators, navigate to Entra ID > Users > All Users
Choose the user whose default sign-in method needs to be changed and click Authentication Methods from the left tab
Click the Edit pencil next to Default sign-in method and select Microsoft Authenticator notification
Recommended Configuration
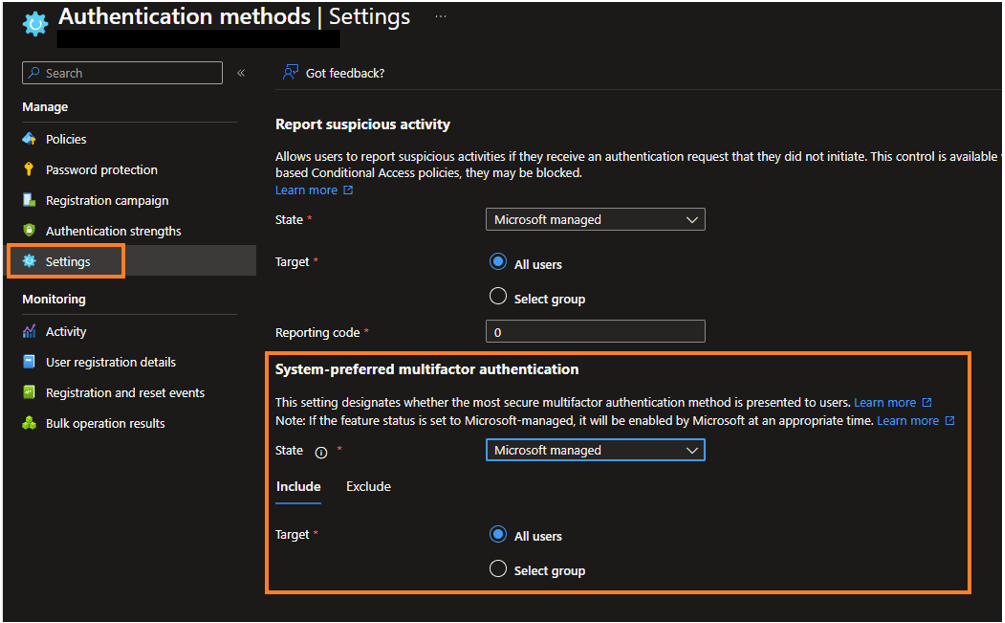
The Microsoft recommended setting is changing the System-preferred multifactor authentication state to Microsoft Managed. Changing the state to Microsoft Managed will ensure the most secure multifactor authentication method is used, avoiding weaker authentication methods like SMS or voice calls. This will also help avoid dangers like man-in-the-middle (MitM) attacks and SIM swapping attacks.
To set a Microsoft Managed state, navigate to: Azure Portal > Authentication Methods > Settings
To setup a registration campaign and move users to approve/deny access requests by using the Authenticator app, follow this guide: https://blog.admindroid.com/registration-campaign-in-microsoft-entra-id-nudge-users-to-set-up-ms-authenticator-app/

