In Part 1 of this series, we built a working Cisco Meraki MCP server from the ground up on a Windows workstation. We installed Python and Git, cloned the Meraki MCP project, created a Python virtual environment, configured our Meraki API credentials, enabled read-only mode, and connected the server to Claude Desktop using the local stdio transport.
That gave us a working MCP integration:
Claude Desktop → stdio → Python MCP Server → Meraki Dashboard API
It worked, but there was an obvious limitation: the entire application depended on our workstation.
The source code was on our computer. Python was installed on our computer. The required Python packages were installed inside a virtual environment on our computer. Claude launched the server using a filesystem path specific to our computer.
If we wanted to run this somewhere else, we’d have to recreate that environment.
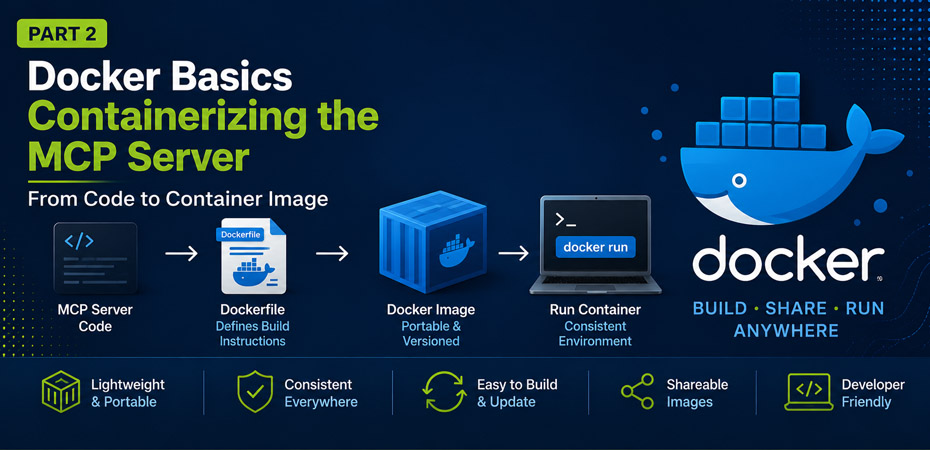
In Part 2, we’re going to solve that problem by containerizing the MCP server with Docker.
We’ll install Docker Desktop and Windows Subsystem for Linux 2 (WSL2), understand the difference between an image and a container, examine how the Dockerfile packages our application, change MCP from local stdio communication to HTTP, build the image, run a container, inject our Meraki credentials at runtime, expose port 8000, and test the MCP endpoint.
We’ll also work through several problems that are particularly common when developing Linux containers from Windows, including Windows CRLF (Carriage Return + Line Feed \r\n) line endings, environment-variable precedence, and PowerShell’s confusing handling of the curl command.
By the end of this article, our architecture will have changed from this:
Claude Desktop → stdio → Local Python Process → Meraki API
to this:
MCP Client → HTTP → Docker Container → Meraki MCP Server → Meraki API
That transition is important because we’re preparing the application to leave our workstation entirely.
In Part 3, we’ll take the exact container image concept we’re building here, store it in Azure Container Registry, and run it as a remotely accessible service using Azure Container Apps.
Where We Are in the Series
This is Part 2 of our six-part journey.
Part 1 — Build the MCP server locally and connect it to Claude Desktop.
Part 2 — Containerize the MCP server with Docker.
Part 3 — Build and store the image in Azure Container Registry and run it using Azure Container Apps.
Part 4 — Secure the remote MCP service using Microsoft Entra ID and Azure API Management.
Part 5 — Move the workload to Azure Kubernetes Service and learn how Kubernetes runs and manages our containers.
Part 6 — Rebuild the platform using Terraform and automate deployments with Azure DevOps pipelines.
We’re deliberately adding one architectural layer at a time.
For this article, Azure still isn’t required.
Everything we’re about to do can be completed on the same Windows workstation we used in Part 1.
Why Docker?
Before installing anything, we need to understand the problem Docker is solving.
At the end of Part 1, our MCP application consisted of several pieces:
Windows
Python 3.13
Our project source code
Python virtual environment
Python dependencies
Meraki MCP configuration
Meraki API credentials
Claude Desktop
That works when we’re the only person using the application on the computer where it was developed.
It becomes much more complicated when we want to move the application somewhere else.
Imagine handing the project to another engineer.
We might tell them:
- Install the correct version of Python.
- Install Git.
- Clone the repository.
- Create a virtual environment.
- Activate it.
- Install the correct Python dependencies.
- Configure the environment variables.
- Make sure the paths are correct.
- Run the application.
And then we discover:
“It works on my computer.”
That’s exactly the kind of problem containers are designed to reduce.
Instead of separately moving our source code and recreating its runtime environment, we package the application and the runtime it requires into a standardized container image.
Conceptually:
Application Code
Python Runtime
Python Packages
Startup Instructions
=
Container Image
That image becomes the portable unit we deploy.
The computer running it no longer needs to understand how we originally assembled the Python application. It needs a container runtime capable of running the image.
For us, that runtime will initially be Docker.
Later, Azure Container Apps will run it.
After that, Kubernetes will run it.
That is one of the most important ideas in this entire series:
The application stays largely the same. The platform responsible for running the container changes.
Image vs. Container
Two Docker terms are going to appear constantly from this point forward:
Image
Container
They are related, but they are not the same thing.
A Docker image is the packaged template.
A Docker container is a running instance of that template.
A useful analogy is:
Image = VM template
Container = Running VM created from that template
It isn’t technically the same architecture as virtualization, but it’s a useful starting mental model.
Another analogy is:
Image = class
Container = object instantiated from the class
Or even more simply:
Image = recipe
Container = meal made from the recipe
When we run:
docker build
we create an image.
When we run:
docker run
we create a running container from that image.
One image can create many containers.
That becomes extremely important when we get to Kubernetes.
Instead of maintaining three separate copies of our application, Kubernetes can take one image and create three running containers from it.
For now, we’ll create only one.
Our Docker Architecture
After completing this article, our local architecture will look roughly like this:
Windows Workstation
↓ Port 8000
Docker Desktop
↓
Linux Container
↓
Python / FastMCP
↓
meraki-mcp-dynamic.py
↓
Meraki Dashboard API
Notice something else that’s changing.
Claude Desktop is no longer launching the Python process directly using stdio.
Our application is becoming a network service.
That means we need to change the MCP transport.
stdio vs. HTTP
In Part 1, we used:
MCP_TRANSPORT=stdio
stdio was perfect for local development.
Claude Desktop and the MCP server were running on the same computer. Claude could launch the MCP process directly and communicate through standard input and output.
There was no network connection between Claude and the MCP server.
Conceptually:
Claude Desktop
↓
stdin / stdout
↓
MCP Server
Once we move the server into a container, and especially once we eventually move that container into Azure, that model stops being practical.
A remote MCP client cannot communicate with a process running on another server using that process’s local stdin and stdout.
We need a network-reachable transport.
For our containerized version, we’ll use HTTP.
The new model becomes:
MCP Client
↓
HTTP
↓
Port 8000
↓
Docker Container
↓
MCP Server
This is the first major architectural change we’re making to the application.
The source project supports the HTTP transport we need for remote operation. In the eventual remote architecture, Streamable HTTP is the MCP transport used to make the service network reachable rather than process-local.
Step 1: Install Docker Desktop
On Windows, we’ll use Docker Desktop.
Download and install Docker Desktop using the standard Windows installer.
During installation, Docker Desktop will use Windows Subsystem for Linux 2, or WSL2, as the backend for running Linux containers.
This matters because although our workstation is Windows, the container we’re building is Linux-based.
Conceptually:
Windows
↓
Docker Desktop
↓
WSL2
↓
Linux container environment
↓
Our MCP container
The build environment therefore crosses both Windows and Linux, which will become important when we troubleshoot line endings later.
Docker Desktop on Windows depends on WSL2 for this workflow.
Step 2: Install WSL2 if Required
If Docker Desktop reports that WSL isn’t installed, open PowerShell as Administrator and run:
wsl --install
Restart Windows after the installation completes.
Then launch Docker Desktop again.
This was one of the first issues encountered during the original build: Docker Desktop was installed on a Windows machine without the WSL2 backend it required. Installing WSL and restarting resolved it.
You can verify WSL with:
wsl --status
You can also list installed WSL distributions with:
wsl --list --verbose
You should see WSL version 2 in use.
Step 3: Verify Docker
Once Docker Desktop is running, open PowerShell and run:
docker --version
You should receive a Docker version.
Next run:
docker info
docker --version proves that the Docker command-line client is installed.
docker info goes further and communicates with the Docker engine.
If docker --version works but docker info fails, Docker Desktop may not actually be running yet.
Wait for Docker Desktop to finish starting and try again.
Step 4: Return to the Meraki MCP Project
We’re going to continue using the same project from Part 1.
Open PowerShell and navigate to the repository:
cd C:\path\to\meraki-magic-mcp-community
Replace the path with wherever you cloned the project.
Verify you’re in the correct directory:
Get-ChildItem
We need to be in the project directory containing the application source and Docker build files.
This matters because Docker uses the current directory as the build context when we eventually run:
docker build -t meraki-mcp:local .
That final period is important.
It means:
Use the current directory as the Docker build context.
If you run the command from the wrong directory, Docker won’t find the files it needs.
Step 5: Understand the Dockerfile
A Dockerfile is a set of instructions describing how to construct a container image.
Think of it as the build recipe for our application.
The Dockerfile answers questions such as:
Which base operating environment should I start with?
Which application files should be copied into the image?
Which Python packages need to be installed?
Which environment defaults should exist?
Which port will the application use?
What command should execute when a container starts?
Conceptually:
Dockerfile
    ↓
docker build
    ↓
Container Image
The image is not running yet.
It’s simply the packaged result of the build instructions.
The project we’re using already contains the containerization pieces we need, so we don’t need to invent an entirely new Docker architecture.
There are, however, several decisions in that container configuration that are important to understand.
Step 6: Change the MCP Transport to HTTP
The first important setting is:
MCP_TRANSPORT=http
In Part 1, we used:
MCP_TRANSPORT=stdio
Now we need HTTP because the MCP server is becoming a network-reachable application.
This distinction will follow us into Azure:
Local process:
MCP_TRANSPORT=stdio

Container / Azure:
MCP_TRANSPORT=http
stdio is local process-to-process communication.
HTTP allows another process, machine, container platform, or cloud service to reach the application over the network.
Step 7: Bind the MCP Server to 0.0.0.0
The next important setting is:
MCP_HOST=0.0.0.0
This may look strange if you’re accustomed to using:
127.0.0.1
or:
localhost
Inside a container, these addresses have an important meaning.
If our application binds to:
127.0.0.1
it is listening only on the container’s loopback interface.
In other words:
Container
┌─────────────────────────┐
│                         │
│  127.0.0.1:8000         │
│       ↑                 │
│  application            │
│                         │
└─────────────────────────┘
The application can communicate with itself, but traffic entering the container through Docker’s networking may not be able to reach it as expected.
Instead, we bind to:
0.0.0.0
That tells the application to listen on all available interfaces inside the container.
So our configuration becomes:
MCP_HOST=0.0.0.0
This is specifically why the container configuration uses 0.0.0.0: it allows the service to be reached from outside the container rather than binding only to a local interface.
Step 8: Use Port 8000
Our MCP application will listen on:
8000
So:
MCP_PORT=8000
Inside the container, our application will ultimately listen on:
0.0.0.0:8000
Later, Docker will map a port on our Windows workstation to this port inside the container.
That distinction is important.
There are two network contexts:
Windows host
and:
Docker container
They don’t automatically share the same network namespace.
We’ll explicitly connect them when we run the container.
Step 9: Do Not Put the Meraki API Key in the Image
This is one of the most important Docker concepts in the entire walkthrough.
We do not want this:
Container Image
    ↓
MERAKI_API_KEY embedded inside image
Why?
Because images are meant to be portable.
They get:
- stored;
- copied;
- pushed to registries;
- downloaded;
- cached;
- shared between environments;
- deployed repeatedly.
If we bake our API key into the image, our secret travels everywhere the image travels.
Instead, we want:
Container Image
    +
Runtime Secret
    ↓
Running Container
The image should know how to run the application.
The environment running the image should provide the secret.
For local Docker testing, we’ll continue using our .env file.
But Docker will inject those values into the container when it starts.
Later:
Docker .env → Azure Container App secret → Kubernetes Secret
The storage mechanism changes.
The principle doesn’t:
Secrets are supplied at runtime.
The container design specifically avoids baking the real .env credentials into the image; the real values are injected as environment variables when the container starts.
Step 10: Understand Environment Variable Loading
There is another subtle change we need to understand before running the application in a cloud-native environment.
During local Python development, applications often use libraries such as python-dotenv to read a literal .env file from disk.
That is convenient locally.
But Azure Container Apps and Kubernetes don’t require a physical .env file inside the container.
Instead, the platform injects environment variables directly into the process.
Python can retrieve those using:
os.getenv()
Conceptually:
Local development

.env file
   ↓
Python application
becomes:
Container platform

Runtime environment variable
   ↓
os.getenv()
   ↓
Python application
The application therefore shouldn’t depend exclusively on finding a physical .env file inside the container.
The container design uses environment-variable loading so the same image can receive its configuration from Docker today and from cloud platforms later.
Step 11: Review the Environment Variables
Our eventual container runtime configuration looks conceptually like this:
MERAKI_API_KEY=<your-api-key>
MERAKI_ORG_ID=<your-org-id>
READ_ONLY_MODE=true
MCP_TRANSPORT=http
MCP_HOST=0.0.0.0
MCP_PORT=8000
MCP_SERVER=dynamic
The Meraki values are specific to your environment.
Do not publish your real API key.
We’re also continuing to use:
READ_ONLY_MODE=true
Containerizing the application does not change the safety model we established in Part 1.
Our MCP server should remain unable to make Meraki configuration changes while we’re building and testing the infrastructure around it.
Step 12: Build the Docker Image
Now we’re ready to create the image.
Make sure you’re in the project directory:
cd C:\path\to\meraki-magic-mcp-community
Then run:
docker build -t meraki-mcp:local .
Let’s break that command apart.
docker build
tells Docker to build an image.
-t
means we’re assigning the image a tag.
meraki-mcp:local
is our image name and tag.
The naming pattern is:
repository:tag
So ours is:
meraki-mcp
with the tag:
local
Finally:
.
means:
Use the current directory as the build context.
The exact local build command used for this project is docker build -t meraki-mcp:local ..
Step 13: Watch the Build
Docker will now execute the instructions in the Dockerfile.
You’ll see output showing Docker processing the build layers.
Conceptually, Docker is assembling:
Base Linux image
        ↓
Python runtime
        ↓
Application dependencies
        ↓
Meraki MCP source
        ↓
Startup configuration
        ↓
meraki-mcp:local
If the build completes successfully, Docker now has a local image.
Nothing is running yet.
Remember:
docker build
creates an image.
docker run
creates a container.
Step 14: Verify the Image Exists
Run:
docker images
Look for:
meraki-mcp
with the tag:
local
You may see output similar to:
REPOSITORY    TAG      IMAGE ID       CREATED          SIZE
meraki-mcp    local    abc123...      1 minute ago     ...
At this point:
Image exists
Container does not
The image is just sitting in Docker’s local image store waiting to be used.
Step 15: Run the Container
Now we’ll create a live container from the image.
Because we’re reusing the .env file from Part 1, we need to be careful.
Our local .env may still contain values intended for stdio, such as:
MCP_TRANSPORT=stdio
MCP_HOST=127.0.0.1
If we blindly inject that file into Docker, those values can override the HTTP-oriented defaults from the image.
So we’ll explicitly override the networking settings when we start the container.
From PowerShell, run this as one line:
docker run --rm -p 8000:8000 --env-file .env -e MCP_TRANSPORT=http -e MCP_HOST=0.0.0.0 -e MCP_PORT=8000 meraki-mcp:local
The same configuration can be written over multiple PowerShell lines using backticks:
docker run --rm -p 8000:8000 --env-file .env `
-eMCP_TRANSPORT=http `
-eMCP_HOST=0.0.0.0 `
-eMCP_PORT=8000 `
meraki-mcp:local
This is the local runtime pattern used for the containerized server: load the regular .env values, then explicitly force the MCP transport, host, and port needed by the container.
Step 16: Understand the docker run Command
There’s a lot happening in that one command.
Let’s break it down.
docker run
creates and starts a container from an image.
--rm
tells Docker to automatically remove the container after it stops.
That’s useful for development because we don’t need to keep accumulating stopped test containers.
-p 8000:8000
publishes the container’s port.
The format is:
HOST_PORT:CONTAINER_PORT
So:
8000:8000
means:
Windows port 8000
        ↓
Docker
        ↓
Container port 8000
This allows us to access the application from Windows using:
http://localhost:8000
even though the application is actually running inside the Linux container.
Next:
--env-file .env
loads our environment variables from the .env file.
Then:
-e MCP_TRANSPORT=http
forces HTTP mode.
-e MCP_HOST=0.0.0.0
forces the application to listen on all container interfaces.
And:
-e MCP_PORT=8000
forces port 8000.
Finally:
meraki-mcp:local
is the image Docker should use to create the container.
Step 17: Understand Environment Variable Precedence
Why did we specify:
MCP_TRANSPORT=http
on the command line if our Docker configuration already expects HTTP?
Because environment variables have precedence.
During our original build, the container unexpectedly started in stdio mode.
The Docker image itself was configured for HTTP.
So why did it start in stdio?
Because we ran:
--env-file .env
and the .env file still contained:
MCP_TRANSPORT=stdio
from Part 1.
The runtime environment value overrode the image’s default.
The fix was to explicitly provide:
-e MCP_TRANSPORT=http
on the docker run command.
The same thing happened with:
MCP_HOST=127.0.0.1
so we explicitly override that too:
-e MCP_HOST=0.0.0.0
The actual failure and fix are worth remembering: –env-file .env passed the old stdio-oriented settings into the container, and explicit -e values on docker run took precedence and corrected them.
A useful mental model is:
Dockerfile defaults
        ↓
.env runtime values
        ↓
docker run -e values
The values closest to container startup can override earlier defaults.
Step 18: Verify the Container Is Running
Leave the first PowerShell window open.
Open another PowerShell window and run:
docker ps
You should see the running container.
The output will include information such as:
CONTAINER ID
IMAGE
COMMAND
CREATED
STATUS
PORTS
NAMES
The image should be:
meraki-mcp:local
and the port mapping should show something similar to:
0.0.0.0:8000->8000/tcp
That tells us:
Windows port 8000 → container port 8000.
At this point, the application is no longer running as a normal Windows Python process.
It is running inside a Linux container managed by Docker.
Step 19: Test the Root URL
Now test the application.
Use the actual curl executable on Windows:
curl.exe -i http://localhost:8000/
You may receive:
HTTP/1.1 404 Not Found
followed by:
Not Found
That might look like failure.
It isn’t.
In fact, this is a useful test.
The MCP server does not need to provide a webpage at:
/
Its MCP protocol endpoint is elsewhere.
The important part is that we received an HTTP response.
That proves several things worked:
PowerShell
    ↓
localhost:8000
    ↓
Docker port mapping
    ↓
Container
    ↓
Uvicorn / MCP application
    ↓
HTTP 404 response
A real 404 from the server is very different from:
Connection refused
or:
Connection timed out
A 404 from / is therefore expected and confirms the server is alive and responding.
Step 20: Why Use curl.exe Instead of curl?
This is a Windows-specific issue that can be surprisingly confusing.
Depending on the PowerShell version you’re using, typing:
curl
may not behave like the curl command you’re expecting.
Historically, Windows PowerShell aliases curl to:
Invoke-WebRequest
That command has different behavior and syntax.
So during testing, I prefer explicitly calling:
curl.exe
That guarantees we’re using the actual curl executable.
This exact issue appeared during the original build: PowerShell’s curl behavior made a valid HTTP response look more confusing than it actually was.
Step 21: Test the MCP Endpoint
The actual MCP endpoint is:
/mcp
Test it:
curl.exe -i http://localhost:8000/mcp
You may receive a response similar to:
HTTP/1.1 406 Not Acceptable
with a JSON-RPC error explaining that the client must accept:
text/event-stream
Again, this may initially look like failure.
But it’s actually excellent news.
The server is telling us:
“I received your request at the MCP endpoint, but your generic curl request isn’t speaking the MCP protocol correctly.”
That proves:
localhost
    ↓
Docker
    ↓
Port 8000
    ↓
Container
    ↓
FastMCP
    ↓
/mcp
    ↓
MCP protocol handling
is working.
A generic HTTP client is not the same thing as an MCP client.
We aren’t expecting:
/mcp
to return a normal webpage.
Step 22: Understand the 406 Response
The 406 response is particularly useful because it proves more than the 404 did.
The 404 proves:
The web server is alive.
The 406 from /mcp proves:
The MCP route exists and is processing the request.
Our curl command simply doesn’t include everything a real MCP client would send.
Conceptually:
curl
   ↓
GET /mcp
   ↓
MCP server
   ↓
"You aren't speaking MCP correctly"
   ↓
HTTP 406
That’s very different from:
404 Not Found
on /mcp, which could suggest the route doesn’t exist at all.
For this stage of testing, the 406 is exactly the kind of response we want to see.
Step 23: Watch the Container Logs
While making these requests, look at the PowerShell window where the container is running.
You should see Uvicorn/FastMCP logging requests.
For example, a root request may appear similar to:
GET / HTTP/1.1" 404
and the MCP request should show traffic hitting /mcp.
This is extremely useful during troubleshooting.
You now have two perspectives:
Client side:
curl.exe
Server side:
container logs
If the client gives a strange error but the server logs show:
GET / HTTP/1.1" 404
you know the request successfully reached the application.
Step 24: View Logs from Another Terminal
You don’t have to rely only on the foreground terminal.
First find the container:
docker ps
Then use its container ID or name:
docker logs <container-name>
To continuously follow the logs:
docker logs -f <container-name>
This becomes a very important troubleshooting technique once our containers run somewhere other than our local terminal.
The platform changes later, but the idea remains:
Docker:
docker logs
Kubernetes:
kubectl logs
Azure:
platform/container logs.
Step 25: Stop the Container
Because we’re currently running the container interactively, you can return to the original PowerShell window and press:
Ctrl+C
The container will stop.
Because we included:
--rm
Docker will automatically remove that container after it exits.
Check:
docker ps
The container should no longer appear.
But run:
docker images
and you’ll still see:
meraki-mcp:local
This demonstrates the image/container distinction nicely.
The container was disposable.
The image remains.
We can create another container whenever we want:
docker run...
Step 26: Containers Are Disposable
This is a major shift from the way many administrators initially think about servers.
With a traditional server, we may spend years maintaining the same machine.
We:
- patch it;
- repair it;
- modify it;
- install software on it;
- troubleshoot it;
- carefully avoid deleting it.
Containers encourage a different model.
If a container is bad, we don’t necessarily repair that exact container.
We destroy it and create another one from the image.
Conceptually:
Image
  ↓
Container A
  ↓
delete

Image
  ↓
Container B
Nothing important should exist only inside the disposable container.
Our important assets are outside it:
Source code
Dockerfile
Configuration
Secrets
Image
That philosophy becomes even more important with Kubernetes.
Kubernetes may delete and recreate our containers automatically.
If our application only works because somebody manually modified a running container, Kubernetes will expose that mistake very quickly.
Step 27: Troubleshooting the entrypoint.sh Error
Now let’s cover one of the most useful problems from the actual build.
When building the container from source checked out on Windows, we encountered an error similar to:
exec ./entrypoint.sh: no such file or directory
At first glance, this suggests:
entrypoint.sh
doesn’t exist.
But it did exist.
The real problem was Windows line endings.
Windows commonly uses:
CRLF
for text-file line endings.
Linux uses:
LF
The entrypoint.sh script had been checked out with Windows-style CRLF line endings.
Inside the Linux container, this can break the script’s shebang line and produce the misleading:
no such file or directory
error.
The actual root cause and fix from the build were exactly that: Windows CRLF line endings broke entrypoint.sh inside the Linux container.
Step 28: Fix CRLF Line Endings
From PowerShell, run:
(Get-Contententrypoint.sh-Raw) -replace "`r`n", "`n" | Set-Content -NoNewline entrypoint.sh
This converts:
CRLF
to:
LF
Then rebuild the image:
docker build -t meraki-mcp:local .
Run the container again:
docker run --rm -p 8000:8000 --env-file .env -e MCP_TRANSPORT=http -e MCP_HOST=0.0.0.0 -e MCP_PORT=8000 meraki-mcp:local
The exact PowerShell conversion used during troubleshooting was to strip CRLF before rebuilding the image.
This is an excellent example of why container development on Windows sometimes produces errors that initially don’t make sense.
The application may be fine.
The Dockerfile may be fine.
The file may exist.
But the Linux environment inside the container interprets the file differently.
Step 29: Prevent the Line-Ending Problem with Git
You may also want to manage line endings through Git rather than manually converting the file every time.
A .gitattributes file can tell Git that shell scripts should use LF endings.
For example:
*.sh text eol=lf
This helps ensure shell scripts intended for Linux retain Linux-compatible line endings even when the repository is being worked with from Windows.
The important takeaway isn’t simply “run this CRLF fix.”
It’s understanding why it happened:
Windows source checkout
        ↓
CRLF
        ↓
Linux container
        ↓
shell script interpreter problem
Step 30: Troubleshooting a Container Starting in stdio Mode
The second major issue from the original build was even more interesting.
We configured the container for HTTP.
But when it started, the logs showed that the MCP server was running using stdio.
That didn’t make sense at first.
The Docker image expected:
MCP_TRANSPORT=http
But our .env from Part 1 still contained:
MCP_TRANSPORT=stdio
When we started the container with:
--env-file .env
Docker injected that value into the running container.
Runtime configuration won.
The server therefore started in stdio mode.
The fix was:
-e MCP_TRANSPORT=http
We also explicitly set:
-e MCP_HOST=0.0.0.0
and:
-e MCP_PORT=8000
The final command becomes:
docker run --rm -p 8000:8000 --env-file .env `
-e MCP_TRANSPORT=http `
-e MCP_HOST=0.0.0.0 `
-e MCP_PORT=8000 `
meraki-mcp:local
That exact environment-variable conflict occurred because the old local .env values overrode the Dockerfile’s HTTP defaults.
Step 31: Verify the Container’s Environment
If you’re unsure what environment variables actually made it into a running container, Docker can inspect them.
Find the container:
docker ps
Then run:
docker inspect <container-name>
There’s a lot of output.
If you only want the environment variables, PowerShell can still inspect the result, or you can enter the container and examine the environment directly.
For example:
docker exec -it <container-name> env
Be careful with this command.
Your Meraki API key may appear in the output.
Do not paste the output into tickets, documentation, screenshots, or public posts without removing secrets.
The useful part is confirming values such as:
MCP_TRANSPORT=http
MCP_HOST=0.0.0.0
MCP_PORT=8000
READ_ONLY_MODE=true
Step 32: Understand Why We Aren’t Putting .env in the Image
It might seem easier to simply copy .env into the Docker image.
Then we wouldn’t need:
--env-file .env
Don’t do that.
Remember what we’re going to do with this image next.
In Part 3:
Docker Image
    ↓
Azure Container Registry
Once an image is pushed to a registry, anyone with sufficient permission to pull the image can obtain its layers.
Secrets baked into images are difficult to control and rotate safely.
Instead:
Image
    ↓
contains application

Environment
    ↓
contains secrets
This also means the same image can run in multiple environments.
For example:
meraki-mcp:v1
        ↓
Development
MERAKI_API_KEY=dev-key

meraki-mcp:v1
        ↓
Production
MERAKI_API_KEY=prod-key
Same image.
Different runtime configuration.
That’s exactly what we want.
Step 33: Understand the Build → Store → Run Model
At this point, we’ve completed two of the three major container lifecycle concepts.
First:
BUILD
We used:
docker build
to create:
meraki-mcp:local
Second:
RUN
We used:
docker run
to create a live container.
The full model we’re moving toward is:
BUILD
  ↓
Container Image
  ↓
STORE
  ↓
Container Registry
  ↓
RUN
  ↓
Container Platform
Today:
BUILD
docker build

STORE
local Docker image store

RUN
Docker Desktop
In Part 3:
BUILD
Azure Container Registry build

STORE
Azure Container Registry

RUN
Azure Container Apps
Later with Kubernetes:
BUILD
CI/CD pipeline

STORE
Azure Container Registry

RUN
AKS Pods
This build → store → run model is the foundation for the rest of the series.
Step 34: What Docker Is Actually Giving Us
Compare Part 1 to Part 2.
Part 1 required:
Windows
Python
virtual environment
pip packages
source code
local execution
Part 2 gives us:
Docker
    ↓
meraki-mcp:local
The image carries the runtime requirements for the application.
That means the next platform doesn’t need to recreate our Python virtual environment manually.
It needs to run our image.
That is precisely why the next step becomes much easier.
Azure Container Apps does not need us to:
Install Python
Create .venv
Activate .venv
pip install requirements
Run Python script
It needs us to tell it:
Run this container image.
That is a massive simplification.
Step 35: Final Validation
Before moving to Azure, make sure all of these are true.
Verify the image:
docker images
You should see:
meraki-mcp local
Start the container:
docker run --rm -p 8000:8000 --env-file .env `
-e MCP_TRANSPORT=http `
-e MCP_HOST=0.0.0.0 `
-e MCP_PORT=8000 `
meraki-mcp:local
In another PowerShell window:
docker ps
Confirm the container is running.
Test the root endpoint:
curl.exe -i http://localhost:8000/
Expected:
HTTP/1.1 404 Not Found
Then test MCP:
curl.exe -i http://localhost:8000/mcp
A protocol-related response such as:
HTTP/1.1 406 Not Acceptable
with an MCP/JSON-RPC response indicates that the MCP endpoint is alive and processing requests.
Finally, confirm the container is using HTTP rather than stdio by reviewing the startup logs.
At that point, we’re ready for Azure.
Troubleshooting Part 2
Before finishing, let’s collect the important Docker failures in one place.
Docker Desktop says WSL is not installed
Open PowerShell as Administrator:
wsl --install
Restart Windows and reopen Docker Desktop.
Docker Desktop’s Windows workflow requires the WSL2 backend used for our Linux containers.
Docker command exists but Docker isn’t responding
Check:
docker info
If the client is installed but the engine isn’t available, make sure Docker Desktop has fully started.
Docker cannot find the Dockerfile
Check your current directory:
Get-Location
Then:
Get-ChildItem
Make sure you’re inside the Meraki MCP project before running:
docker build -t meraki-mcp:local .
Running the build from the wrong working directory is a common reason Docker can’t find the expected build files.
exec ./entrypoint.sh: no such file or directory
The file may actually exist.
Check for Windows CRLF line endings.
Convert them:
(Get-Contententrypoint.sh-Raw) -replace "`r`n", "`n" | Set-Content -NoNewline entrypoint.sh
Then rebuild:
docker build -t meraki-mcp:local .
This was caused by Windows-style CRLF line endings breaking the shell script inside the Linux container.
Container starts but says stdio instead of HTTP
Your .env file may still contain the Part 1 configuration.
Explicitly override it:
docker run --rm -p 8000:8000 --env-file .env `
-e MCP_TRANSPORT=http `
-e MCP_HOST=0.0.0.0 `
-e MCP_PORT=8000 `
meraki-mcp:local
Runtime -e values override the old stdio values loaded from .env.
curl gives strange errors in PowerShell
Use:
curl.exe
instead of:
curl
Windows PowerShell can alias curl to Invoke-WebRequest, which behaves differently.
http://localhost:8000 returns 404
Good.
If the response is coming from the running application, that means Docker networking and the web server are working.
The root path isn’t the MCP endpoint. A 404 from / is expected for this server.
/mcp returns 406 Not Acceptable
Also good for our simple curl test.
A generic HTTP request isn’t a full MCP client request.
The important part is that /mcp exists, the server processed the request, and it responded with an MCP-related protocol error instead of a network failure.
What We Built
At the end of Part 1, our application looked like this:
Claude Desktop
      ↓
     stdio
      ↓
Local Python Process
      ↓
Meraki Dashboard API
We have now transformed it into:
Windows Workstation
        ↓
 localhost:8000
        ↓
     Docker
        ↓
  Port Mapping
  8000 → 8000
        ↓
Linux Container
        ↓
Python / FastMCP
        ↓
meraki-mcp-dynamic.py
        ↓
      HTTPS
        ↓
Meraki Dashboard API
More importantly, we’ve created a portable artifact:
meraki-mcp:local
That image contains what the application needs to run.
Our credentials remain outside the image.
Our runtime configuration remains outside the image.
And the running container itself is disposable.
We can stop it.
Delete it.
Create another one.
Create ten of them.
As long as we have the image and the required runtime configuration, we can reproduce the application.
That’s the foundation containers give us.
Why This Matters for the Next Step
We now have an application that runs inside a Linux container and communicates over HTTP.
That means we’re no longer tied to our Windows workstation.
But there’s still one major problem:
The image currently exists only inside Docker on our computer.
If Azure Container Apps wants to run this image, Azure needs somewhere to retrieve it from.
That’s what a container registry is for.
In Part 3, we’ll move from:
Docker Desktop
      ↓
Local Image
      ↓
Local Container
to:
Source Code
      ↓
Container Build
      ↓
Azure Container Registry
      ↓
meraki-mcp:v1
      ↓
Azure Container Apps
      ↓
Public HTTPS Endpoint
We’ll create an Azure Container Registry, understand repositories and image tags, build the Meraki image directly into Azure, create an Azure Container Apps environment, deploy the image, configure managed identity and AcrPull, inject the Meraki API key as a runtime secret, configure the MCP environment variables, expose port 8000 through HTTPS ingress, and verify the remote /mcp endpoint.
And just like Parts 1 and 2, we’re not going to skip the failures.
We’ll cover what happens when the Container App references an image that doesn’t actually exist in the registry, why a Container App can hang when its managed identity doesn’t have AcrPull, what revisions are, and why scale-to-zero can make a perfectly healthy MCP server appear unavailable.
At the end of Part 3, we’ll have crossed the biggest boundary in the series so far:
The MCP server will no longer be running on our computer.
It will be running in Azure.
Part 3: Deploying a Meraki MCP Server with Azure Container Registry and Azure Container Apps → next.
 FreshTips