In Part 1 of this series, we built a working Cisco Meraki MCP server locally and connected it to Claude Desktop using stdio.
In Part 2, we containerized that application with Docker. We moved the MCP server from local stdio communication to HTTP, packaged the Python application into a reusable Linux container image, injected our Meraki credentials at runtime, exposed port 8000, and verified the /mcp endpoint.
At the end of Part 2, we had this:
Windows Workstation ↓Docker Desktop ↓meraki-mcp:local ↓Running Container ↓HTTP :8000 ↓Meraki Dashboard API
That’s a major improvement over running Python directly, but we still have one big limitation:
The application is running on our computer.
If our workstation shuts down, the MCP server shuts down.
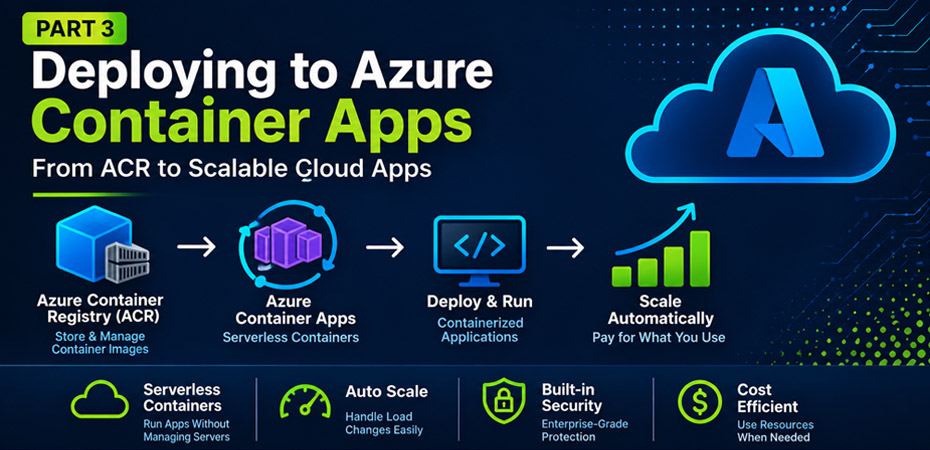
In Part 3, we’re going to move the workload into Azure.
We’ll create an Azure Container Registry, build and store the Meraki MCP image in the registry, deploy that image with Azure Container Apps, configure managed identity so the Container App can securely pull the private image, inject our Meraki API key as a runtime secret, configure our MCP environment variables, expose port 8000 through Azure’s HTTPS ingress, configure scaling, and verify that the MCP server is responding from Azure.
By the end of this article, our architecture will look like this:
Source Code ↓Azure Container Registry Build ↓Azure Container Registry ↓meraki-mcp:v1 ↓Azure Container Apps ↓HTTPS ↓Meraki MCP Server ↓Meraki Dashboard API
This is the point in the series where the MCP server stops depending on our workstation.
It becomes a cloud-hosted service.
Where We Are in the Series
This is Part 3 of our six-part journey.
Part 1 — Build the MCP server locally and connect it to Claude Desktop.
Part 2 — Containerize the MCP server with Docker.
Part 3 — Store the image in Azure Container Registry and run it with Azure Container Apps.
Part 4 — Secure the remote MCP service using Microsoft Entra ID and Azure API Management.
Part 5 — Move the workload to Azure Kubernetes Service and learn how Kubernetes manages our containers.
Part 6 — Rebuild the platform using Terraform and automate deployments with Azure DevOps pipelines.
For Part 3, we’re concentrating on two Azure services:
Azure Container Registry
and
Azure Container Apps
Understanding the difference between them is important before we start building anything.
Azure Container Registry vs. Azure Container Apps
These two services perform completely different jobs.
Azure Container Registry, or ACR, stores container images.
Azure Container Apps, or ACA, runs container images.
Think back to Part 2:
Docker Image ↓docker run ↓Running Container
We’re essentially splitting those responsibilities across Azure services:
Azure Container Registry ↓stores image ↓Azure Container Apps ↓runs image
Another useful way to think about it:
ACR = Container image warehouseContainer Apps = Container runtime
ACR doesn’t execute our MCP server.
An image sitting in ACR isn’t a live container and isn’t actively running our application. It’s simply the packaged image stored in a registry.
Container Apps retrieves that image and creates running instances from it.
The architecture becomes:
Source Code ↓Build ↓ACR ↓Image ↓Container Apps ↓Running Container
Why Use Azure Container Registry?
We already built this image locally in Part 2:
meraki-mcp:local
Why can’t we simply tell Azure Container Apps to use it?
Because that image exists only in our local Docker environment.
Azure needs a registry from which it can retrieve the image.
That’s where ACR comes in.
Azure Container Registry gives us a private Azure-hosted location for images such as:
meraki-mcp:v1
As the application evolves, we might eventually have:
meraki-mcp:v1meraki-mcp:v2meraki-mcp:v3
And if we eventually create additional MCP servers, the same registry could contain multiple repositories:
meraki-mcp:v1network-mcp:v1backup-mcp:v1directory-mcp:v1
We don’t necessarily need a separate registry for every application.
A registry can contain multiple repositories, and each repository can contain multiple image versions.
Repository vs. Image vs. Tag
Before creating ACR, let’s get three terms straight.
Suppose our image is:
acrmcpdemo.azurecr.io/meraki-mcp:v1
We can break that into:
acrmcpdemo.azurecr.io
Registry.
meraki-mcp
Repository.
v1
Tag.
Conceptually:
Registry└── meraki-mcp ├── v1 ├── v2 └── v3
The tag gives us a way to identify different versions of an image.
For this walkthrough, we’ll use:
meraki-mcp:v1
The Azure Resources We’re Building
For this article, we’ll use generic example resource names that you can replace with names appropriate for your environment.
Resource Group:rg-mcp-demo-prodRegion:East US 2Azure Container Registry:acrmcpdemoContainer Repository:meraki-mcpImage Tag:v1Container App:ca-meraki-mcp-prod
Our basic resource structure will look like:
Resource Group│├── Azure Container Registry│ └── meraki-mcp:v1│└── Container Apps Environment └── Container App └── Meraki MCP Container
Let’s build it.
Step 1: Create the Resource Group
Sign in to the Azure Portal.
Search for:
Resource groups
Select:
Create
Choose your Azure subscription.
For this example, enter:
Resource group:rg-mcp-demo-prod
Region:
East US 2
Select:
Review + create
Then:
Create
The resource group will serve as the logical container for the Azure resources supporting our MCP deployment.
Step 2: Create Azure Container Registry
In the Azure Portal, search for:
Container registries
Select:
Create
Choose the subscription and resource group:
rg-mcp-demo-prod
Enter a registry name.
For this walkthrough:
acrmcpdemo
Important: Azure Container Registry names must be globally unique across Azure.
That means acrmcpdemo may already be taken by someone else.
If Azure reports that the name isn’t available, use your own unique variation and substitute that name throughout the commands in this article.
Select:
Region:East US 2
For a lab or small deployment, select:
SKU:Basic
Select:
Review + create
and then:
Create
Step 3: Understand What We Just Created
At this point, our registry exists.
But it doesn’t contain our application.
That’s an important distinction.
Creating:
acrmcpdemo
does not automatically move:
meraki-mcp:local
from Docker Desktop into Azure.
Right now we have two completely separate things:
LOCALDocker Desktop└── meraki-mcp:local
and:
AZUREAzure Container Registry└── Empty
We need to build or push an image into the registry.
For this walkthrough, we’re going to build it directly in Azure.
Step 4: Open Azure Cloud Shell
From the Azure Portal, open Cloud Shell.
If prompted, select PowerShell.
We’re going to clone the source code into Cloud Shell and use Azure Container Registry’s remote build capability.
This also has a nice side benefit.
In Part 2, we encountered the Windows CRLF problem where entrypoint.sh could produce:
exec ./entrypoint.sh: no such file or directory
even though the file existed.
Cloning the repository inside the Linux environment used by Cloud Shell avoids the Windows checkout that caused that particular line-ending problem.
Step 5: Clone the Meraki MCP Project
In Cloud Shell, return to your home directory:
cd ~
Clone the project:
git clone https://github.com/CiscoDevNet/meraki-magic-mcp-community.git
Navigate into the repository:
cd ~/meraki-magic-mcp-community
Verify the files:
ls
Make sure you’re in the project directory containing the Dockerfile.
This is important because we’re about to use the current directory as our container build context.
Step 6: Build the Image Directly in Azure Container Registry
In Part 2, we built our image locally with:
docker build -t meraki-mcp:local .
This time, we’re going to let Azure perform the build.
Run:
az acr build --registry acrmcpdemo --image meraki-mcp:v1 .
If you chose a different globally unique registry name, substitute it here.
The command means:
az acr build
Build a container image using Azure Container Registry.
--registry acrmcpdemo
Use our ACR.
--image meraki-mcp:v1
Name the resulting image meraki-mcp and tag it v1.
And finally:
.
Use the current directory as the build context.
Conceptually:
Cloud Shell ↓Source Code ↓az acr build ↓ACR Build ↓Dockerfile ↓Container Image ↓meraki-mcp:v1 ↓Azure Container Registry
Unlike our Part 2 process, we don’t need to separately build the image locally and then push it.
az acr build uploads the source, performs the build in Azure, and stores the resulting image in ACR.
Step 7: Verify the Repository
Once the build finishes, don’t immediately move on to Container Apps.
First verify that the image actually exists.
Run:
az acr repository list --name acrmcpdemo --output table
You should see:
meraki-mcp
Now check the available tags:
az acr repository show-tags --name acrmcpdemo --repository meraki-mcp --output table
You should see:
v1
We now have:
Azure Container Registry└── meraki-mcp └── v1
This verification is important.
A Container App can’t run an image that doesn’t actually exist in the registry.
Step 8: Verify the Image in the Azure Portal
We can also verify this graphically.
In the Azure Portal, navigate to:
Container registries→ acrmcpdemo→ Repositories
You should see:
meraki-mcp
Select it.
You should then see:
v1
At this point, the image exists in Azure.
But remember:
Nothing is running.
ACR stores images.
It does not run containers.
We now need a runtime.
Step 9: Introducing Azure Container Apps
Azure Container Apps is going to be our first Azure runtime for the MCP server.
Container Apps allows us to run containers without directly managing the underlying virtual machines or Kubernetes cluster.
We’re essentially going to tell Azure:
Here is my image.Run it.Give it CPU and memory.Inject my configuration.Inject my secret.Listen on port 8000.Expose it through HTTPS.Keep at least one instance running.
Azure manages the underlying compute infrastructure.
Conceptually:
Azure Container Registry ↓meraki-mcp:v1 ↓Azure Container Apps ↓Running Container
Step 10: Create the Container App
In the Azure Portal, search for:
Container Apps
Select:
Create
Choose your subscription.
For the resource group, select:
rg-mcp-demo-prod
For the Container App name, use:
ca-meraki-mcp-prod
Region:
East US 2
You’ll also need a Container Apps Environment.
If you don’t already have an appropriate environment, create a new one.
You might use a name such as:
cae-mcp-demo-prod
Conceptually:
Container Apps Environment ↓Container App ↓Container
The environment provides the boundary and underlying infrastructure in which our Container App operates.
Step 11: Select the Container Image
During the Container App creation process, configure the container image.
Choose:
Image source:Azure Container Registry
Registry:
acrmcpdemo
Repository:
meraki-mcp
Tag:
v1
The complete image reference will look like:
acrmcpdemo.azurecr.io/meraki-mcp:v1
We now have the relationship:
Azure Container Registryacrmcpdemo ↓meraki-mcp:v1 ↓Azure Container Appsca-meraki-mcp-prod
Step 12: Configure CPU and Memory
Container Apps allows us to assign CPU and memory resources to the running container.
For a lightweight MCP server, we don’t need to start with a large amount of compute.
Start conservatively and monitor actual utilization before increasing resources.
The important distinction here is:
ACR Image ↓Stored artifact
versus:
Container App Replica ↓Running workload ↓CPU + Memory
The registry stores the image.
The replica consumes compute resources while running the application.
Step 13: Configure Ingress
Our MCP server needs to receive HTTP traffic.
Enable:
Ingress
For this stage of the series, allow traffic from:
Anywhere
Set the target port to:
8000
Transport:
Auto
Leave insecure connections disabled so HTTPS is enforced.
Our traffic flow becomes:
Internet ↓HTTPS :443 ↓Azure Container Apps Ingress ↓Target Port 8000 ↓Container ↓Meraki MCP Server
Notice that users aren’t directly connecting to public port 8000.
Azure provides the public HTTPS endpoint and routes the request internally to port 8000 inside the application.
Step 14: Configure the MCP Environment Variables
Our application still needs the same runtime configuration we used with Docker.
The hosting platform has changed.
The application hasn’t.
Configure the appropriate environment variables:
MERAKI_ORG_ID=<YOUR ORGANIZATION ID>READ_ONLY_MODE=trueMCP_TRANSPORT=httpMCP_HOST=0.0.0.0MCP_PORT=8000MCP_SERVER=dynamic
These should look familiar from Part 2.
We still need:
MCP_TRANSPORT=http
because this is now a network service.
We still need:
MCP_HOST=0.0.0.0
because the application needs to listen on the container’s available network interfaces.
And we still need:
MCP_PORT=8000
because that’s the port our Container App ingress will target.
Step 15: Create the Meraki API Key Secret
Our most sensitive environment value is:
MERAKI_API_KEY
Do not bake the API key into the container image.
Also avoid storing it as an ordinary plaintext environment variable.
Instead, create a Container App secret.
Use a generic secret name such as:
meraki-api-key
Enter your actual Meraki API key as the secret value.
Then create the environment variable:
MERAKI_API_KEY
and configure it to reference:
meraki-api-key
Conceptually:
Container App Secretmeraki-api-key ↓Environment VariableMERAKI_API_KEY ↓Container ↓Python Application
The application can continue retrieving the value as an environment variable.
It doesn’t need to know how Azure stored the underlying secret.
Step 16: Why the Secret Isn’t Stored in ACR
This distinction is worth reinforcing.
Our container image contains the application and everything required to execute it.
It should not contain environment-specific credentials.
Think of the architecture like this:
Azure Container Registry ↓meraki-mcp:v1 ↓ApplicationPython RuntimeDependenciesStartup Instructions
Separately:
Azure Container Apps ↓Runtime Configuration ↓MERAKI_API_KEYMERAKI_ORG_IDREAD_ONLY_MODEMCP_TRANSPORTMCP_HOSTMCP_PORT
When the Container App starts:
Container Image +Runtime Configuration +Secret ↓Running Application
This means we could theoretically use the exact same image in development and production while supplying different runtime configuration to each environment.
Step 17: Enable Managed Identity
We have another authentication problem to solve.
Our Container App needs to retrieve:
meraki-mcp:v1
from our private registry:
acrmcpdemo
Instead of creating and storing another username and password, we’ll use Azure Managed Identity.
Open the Container App and navigate to:
Identity
Enable:
System assigned
and save the change.
Azure creates an identity associated specifically with the Container App.
Conceptually:
Container App ↓System-Assigned Managed Identity ↓Azure RBAC ↓Azure Container Registry
This gives our application an Azure identity without requiring us to manually manage credentials for it.
But simply creating the identity doesn’t give it permission to do anything.
We still need authorization.
Step 18: Grant AcrPull
The Container App needs permission to pull images from our registry.
The Azure RBAC role specifically designed for this is:
AcrPull
The relationship we want is:
ca-meraki-mcp-prod ↓System-Assigned Managed Identity ↓AcrPull ↓acrmcpdemo ↓meraki-mcp:v1
AcrPull doesn’t make the Container App an administrator of the registry.
It grants the ability required to retrieve container images.
Step 19: Grant AcrPull in the Azure Portal
Navigate to:
Azure Portal→ Container registries→ acrmcpdemo→ Access control (IAM)
Select:
Add→ Add role assignment
Choose:
AcrPull
For the member type, select:
Managed identity
Select the managed identity associated with:
ca-meraki-mcp-prod
Complete the role assignment.
Azure RBAC changes aren’t always instantaneous.
Give the assignment a short amount of time to propagate before troubleshooting an image-pull failure.
Step 20: Grant AcrPull with Azure CLI
We can perform the same operation using Cloud Shell.
Run:
az role assignment create ` --assignee (az containerapp show -n ca-meraki-mcp-prod -g rg-mcp-demo-prod --query identity.principalId -o tsv) ` --role AcrPull ` --scope (az acr show -n acrmcpdemo --query id -o tsv)
Let’s break that apart.
This portion:
az containerapp show -n ca-meraki-mcp-prod -g rg-mcp-demo-prod --query identity.principalId -o tsv
retrieves the Container App’s managed identity principal ID.
This portion:
az acr show -n acrmcpdemo --query id -o tsv
retrieves the Azure resource ID of the registry.
And:
--role AcrPull
creates the required authorization relationship.
Step 21: Why AcrPull Matters So Much
This is one of those Azure dependencies that can produce symptoms that look unrelated to the actual problem.
Imagine:
The Container App exists.
The registry exists.
The image exists.
The image name is correct.
Ingress is configured.
The environment variables are configured.
But the application never becomes healthy.
The temptation is to start debugging Python or MCP.
But the problem could simply be:
Container App ↓tries to retrieve image ↓ACR ↓ACCESS DENIED
If the runtime can’t retrieve the image, the application never even gets a chance to start.
That’s why a useful troubleshooting order is:
Does the image exist? ↓Can the runtime pull it? ↓Can the container start? ↓Is the application process running? ↓Is it listening on port 8000? ↓Can ingress reach it? ↓Can the client communicate using MCP?
Troubleshooting from the infrastructure inward can save a tremendous amount of time.
Step 22: Redeploy the Image
After assigning AcrPull, give Azure a little time for the role assignment to propagate.
Then force the Container App to use our image:
az containerapp update ` -n ca-meraki-mcp-prod ` -g rg-mcp-demo-prod ` --image acrmcpdemo.azurecr.io/meraki-mcp:v1 ` --no-wait
Notice:
--no-wait
Instead of leaving Cloud Shell waiting for the deployment to finish, Azure accepts the request and returns control to us.
We can then inspect the deployment status separately.
Step 23: Understand Container App Revisions
Azure Container Apps uses revisions.
A revision is an immutable snapshot of a particular Container App configuration.
Conceptually:
Container App│├── Revision 1│ └── Original configuration│├── Revision 2│ └── Updated image/configuration│└── Revision 3 └── Newer configuration
Changes to revision-scoped settings can cause Azure to create a new revision.
This is an important shift away from the traditional server model.
We’re not thinking:
Keep modifying the same server forever.
We’re moving toward:
Define configuration ↓Deploy ↓Create new version ↓Replace old workload
We’ll see this model become even more prominent when we get to Kubernetes.
Step 24: Check the Container App Status
From Cloud Shell:
az containerapp show ` -n ca-meraki-mcp-prod ` -g rg-mcp-demo-prod
You can also inspect the revisions:
az containerapp revision list ` -n ca-meraki-mcp-prod ` -g rg-mcp-demo-prod ` -o table
We’re looking for an active, healthy revision.
If the Container App shows a failed state and no revision successfully provisions, don’t immediately assume the application code is broken.
First verify the image exists and the managed identity can retrieve it.
Step 25: Configure Minimum Replicas
Azure Container Apps can automatically scale workloads based on demand.
That includes scaling an application all the way down to:
0 replicas
This can be useful for reducing cost.
But it can also be confusing when you’re building an interactive MCP service and expect it to respond immediately.
For this walkthrough, we’ll keep at least one replica running.
In the Azure Portal, configure:
Minimum replicas:1
Or use Cloud Shell:
az containerapp update ` -n ca-meraki-mcp-prod ` -g rg-mcp-demo-prod ` --min-replicas 1 ` --no-wait
Now Azure should maintain at least one running instance of the application.
Step 26: What Is a Replica?
This term will become extremely important when we get to Kubernetes.
A replica is a running instance of our containerized application.
We have one stored image:
ACR└── meraki-mcp:v1
Container Apps might create:
Replica 1└── running meraki-mcp:v1
If we configured the platform to run multiple instances, it could create:
Replica 1└── meraki-mcp:v1Replica 2└── meraki-mcp:v1Replica 3└── meraki-mcp:v1
We still have only one image stored in ACR.
The platform is simply creating multiple running instances from that image.
This is the same fundamental concept we’ll later see with Kubernetes Pods.
Step 27: Get the Container App URL
Open:
Azure Portal→ Container Apps→ ca-meraki-mcp-prod
Azure provides an Application URL.
It will look similar to:
https://ca-meraki-mcp-prod.<generated-domain>.<region>.azurecontainerapps.io
Your generated domain will be different.
The actual MCP endpoint is:
/mcp
So the URL we ultimately care about becomes:
https://<YOUR-CONTAINER-APP-URL>/mcp
Step 28: Test the Root URL
From your workstation, run:
curl.exe -i https://<YOUR-CONTAINER-APP-URL>/
You may receive a 404.
As we learned in Part 2, a 404 isn’t automatically bad.
The root path:
/
isn’t our MCP endpoint.
What matters is where the response came from.
Step 29: Understand the Good 404 vs. the Bad 404
This distinction became particularly useful while troubleshooting the deployment.
In Part 2, our local container returned something like:
HTTP/1.1 404 Not Foundserver: uvicorn
That was actually good.
The request traveled through Docker and reached our application.
The application simply didn’t have a route for:
/
Conceptually:
Request ↓Container ↓Uvicorn ↓Application ↓404
Azure can also generate its own platform-level unavailable response when there isn’t a healthy application replica behind the ingress endpoint.
Those two situations are completely different.
Don’t look only at:
404
Ask:
Who returned the 404?
Our application?
Or Azure’s platform?
Step 30: Test the Actual MCP Endpoint
Now test the route we actually care about:
curl.exe -i https://<YOUR-CONTAINER-APP-URL>/mcp
A response may look similar to:
HTTP/1.1 406 Not Acceptableserver: uvicornmcp-session-id: <session-id>{"jsonrpc":"2.0","id":"server-error","error":{"code":-32600,"message":"Not Acceptable: Client must accept text/event-stream"}}
That might look like failure.
It’s actually an extremely useful result.
Remember Part 2:
A generic curl request isn’t a full MCP client.
The server is effectively telling us:
I received your request.You reached the MCP endpoint.But you're not speaking the protocol the way an MCP client should.
That’s exactly what we want to prove at this stage.
Step 31: Trace the Request
Our request path now looks like this:
Your Computer ↓HTTPS ↓Azure Container Apps ↓Public Ingress ↓Target Port 8000 ↓Container App Replica ↓Linux Container ↓Uvicorn ↓FastMCP ↓/mcp
When the MCP server needs Meraki information:
FastMCP ↓MERAKI_API_KEY ↓HTTPS ↓Meraki Dashboard API
Meanwhile, the container itself came from:
Azure Container Registry ↓AcrPull ↓Managed Identity ↓Container Apps
Each component has a distinct responsibility.
Step 32: Our Complete Part 3 Architecture
We can now visualize the entire deployment.
BUILD PATHGitHub Source ↓Azure Cloud Shell ↓az acr build ↓Azure Container Registry ↓Repository: meraki-mcp ↓Tag: v1
Then:
RUNTIME PATHAzure Container Registry ↓AcrPull ↓System-Assigned Managed Identity ↓Azure Container Apps ↓Running Replica ↓Linux Container ↓MCP_TRANSPORT=httpMCP_HOST=0.0.0.0MCP_PORT=8000 ↓HTTPS Ingress ↓/mcp
And finally:
API PATHMCP Server ↓MERAKI_API_KEY ↓Meraki Dashboard API
Step 33: Final Validation
Before calling Part 3 complete, verify each layer.
Verify ACR
Run:
az acr repository list --name acrmcpdemo --output table
You should see:
meraki-mcp
Then:
az acr repository show-tags ` --name acrmcpdemo ` --repository meraki-mcp ` --output table
You should see:
v1
Verify the Container Image
The Container App should reference:
acrmcpdemo.azurecr.io/meraki-mcp:v1
Verify Managed Identity
The Container App should have:
System assigned:On
Verify ACR Authorization
The Container App’s managed identity should have:
AcrPull
on:
acrmcpdemo
Verify Ingress
Confirm:
Ingress:EnabledTraffic:ExternalTarget port:8000Insecure connections:Disabled
Verify Runtime Configuration
Confirm:
READ_ONLY_MODE=trueMCP_TRANSPORT=httpMCP_HOST=0.0.0.0MCP_PORT=8000MCP_SERVER=dynamic
Confirm:
MERAKI_API_KEY
references a secret rather than exposing the API key as a normal value.
Verify Scaling
Confirm:
Minimum replicas:1
Verify the Application
Finally:
curl.exe -i https://<YOUR-CONTAINER-APP-URL>/mcp
We want a response from the MCP application itself.
A protocol-related 406 response from Uvicorn/FastMCP confirms we’ve successfully reached the application.
Troubleshooting Part 3
Several problems can look very similar during this deployment.
Let’s walk through them in the order I’d troubleshoot them.
ACR Name Is Unavailable
Azure Container Registry names are globally unique.
If:
acrmcpdemo
is unavailable, choose a more distinctive name.
Remember to substitute your chosen registry name throughout the rest of the commands.
az acr build Can’t Find the Dockerfile
Check your current directory:
pwd
Then:
ls
Make sure you’re inside:
meraki-magic-mcp-community
before running:
az acr build --registry acrmcpdemo --image meraki-mcp:v1 .
Remember what the final period means:
.=current directory
If you’re in the wrong directory, Azure receives the wrong build context.
Container App Shows Failed
Don’t immediately start debugging the Python application.
First verify the repository:
az acr repository list --name acrmcpdemo --output table
Then verify the image tag:
az acr repository show-tags ` --name acrmcpdemo ` --repository meraki-mcp ` --output table
You need:
meraki-mcp
and:
v1
If the Container App references an image that doesn’t exist, the application can never start.
Image Exists but the Container App Still Won’t Start
Check:
Managed Identity
and:
AcrPull
The Container App’s identity needs permission to retrieve the image.
You can create the assignment with:
az role assignment create ` --assignee (az containerapp show -n ca-meraki-mcp-prod -g rg-mcp-demo-prod --query identity.principalId -o tsv) ` --role AcrPull ` --scope (az acr show -n acrmcpdemo --query id -o tsv)
Then allow a little time for RBAC propagation.
az containerapp update Appears to Hang
A deployment command waiting indefinitely doesn’t necessarily mean Azure CLI itself is broken.
The new revision may be unable to become healthy.
One possible cause is that the Container App can’t retrieve its image.
Check:
Image exists?
Then:
Managed identity enabled?
Then:
AcrPull assigned?
After correcting the problem, redeploy using:
az containerapp update ` -n ca-meraki-mcp-prod ` -g rg-mcp-demo-prod ` --image acrmcpdemo.azurecr.io/meraki-mcp:v1 ` --no-wait
Then inspect revisions separately:
az containerapp revision list ` -n ca-meraki-mcp-prod ` -g rg-mcp-demo-prod ` -o table
Azure Says the Container App Is Stopped or Doesn’t Exist
Check the scaling configuration.
If the minimum replica count is zero, the application may have scaled down.
For an interactive MCP service, set:
az containerapp update ` -n ca-meraki-mcp-prod ` -g rg-mcp-demo-prod ` --min-replicas 1 ` --no-wait
Then give Azure time to start a healthy replica.
Root URL Returns 404
Don’t use:
/
as your only application test.
Test:
/mcp
instead:
curl.exe -i https://<YOUR-CONTAINER-APP-URL>/mcp
Look for a response from:
server: uvicorn
rather than an Azure-generated unavailable page.
/mcp Returns 406 Not Acceptable
That’s expected from our basic curl test.
A generic HTTP request isn’t a complete MCP client request.
The important part is that:
/mcp
exists and FastMCP is processing the request.
At this stage:
406 from Uvicorn/FastMCP
is much better than:
Connection refused
or:
Connection timed out
or an Azure platform unavailable page.
A Useful Troubleshooting Sequence
Here’s the troubleshooting sequence I recommend for this deployment:
1. Container App fails ↓2. Verify ACR repository ↓3. Verify image tag ↓4. Verify Container App image reference ↓5. Verify managed identity ↓6. Verify AcrPull ↓7. Check revisions ↓8. Verify at least one replica is running ↓9. Verify ingress target port 8000 ↓10. Test /mcp ↓11. Confirm response comes from Uvicorn
This sequence is valuable because it works from the infrastructure inward.
There’s no reason to troubleshoot Python if Azure can’t even retrieve the container image.
What We Built
Let’s compare our architecture across the first three parts.
Part 1:
Claude Desktop ↓stdio ↓Local Python MCP Server ↓Meraki Dashboard API
Part 2:
Windows Workstation ↓Docker ↓Linux Container ↓HTTP :8000 ↓Meraki MCP Server ↓Meraki Dashboard API
And now Part 3:
Azure Container Registry ↓meraki-mcp:v1 ↓Managed Identity + AcrPull ↓Azure Container Apps ↓Running Replica ↓HTTPS Ingress ↓/mcp ↓Meraki MCP Server ↓Meraki Dashboard API
We’ve separated the application into several clearly defined responsibilities:
Source Code ↓Defines the applicationDockerfile ↓Defines the containerAzure Container Registry ↓Stores the imageManaged Identity ↓Provides an Azure identityAcrPull ↓Authorizes image retrievalAzure Container Apps ↓Runs the imageContainer App Secret ↓Protects the Meraki API keyEnvironment Variables ↓Configure the applicationIngress ↓Exposes the service over HTTPSMeraki Dashboard API ↓Provides the underlying network data
That’s a dramatically different architecture from the Python process we started with in Part 1.
And our workstation is no longer responsible for keeping the MCP server alive.
But We Now Have a Security Problem
We’ve accomplished our main objective:
The MCP server is running in Azure.
But there’s an obvious issue.
For this stage of the build, we enabled:
External ingress
That makes the Container App publicly reachable.
Our Meraki API key is protected as a runtime secret.
That’s good.
But protecting the API key answers only this question:
How does the MCP server authenticate to Meraki?
We still need to answer another question:
How does a user authenticate to the MCP server?
Those are two completely different trust relationships.
TRUST RELATIONSHIP #1MCP Server ↓Meraki Dashboard API
and:
TRUST RELATIONSHIP #2MCP Client ↓MCP Server
We’ve addressed the first.
We haven’t fully addressed the second.
That’s exactly what we’ll tackle next.
Where We’re Going Next
Our current architecture is:
Internet ↓Azure Container Apps ↓Meraki MCP Server ↓Meraki Dashboard API
We now want to introduce identity and API governance.
Conceptually, we’re heading toward:
MCP Client ↓Microsoft Entra ID ↓OAuth Access Token ↓Azure API Management ↓AuthenticationAuthorizationAPI Policies ↓Azure Container Apps ↓Meraki MCP Server ↓Meraki Dashboard API
This is where the project starts moving from simply “hosting a container in Azure” toward an enterprise MCP architecture.
Coming Next: Part 4 — Securing the Meraki MCP Server with Microsoft Entra ID and Azure API Management
In Part 4, we’ll take the publicly reachable MCP server we just deployed and add the identity and security layers required to control who can actually use it.
We’ll work through:
Microsoft Entra ID app registrations
Resource applications and client applications
OAuth scopes
Application ID URIs
User authentication
Access tokens
Token audiences
Azure API Management
MCP authorization discovery
Protected Resource Metadata
JWT validation
API Management policies
Custom domains
Certificates
and the complete authenticated request path from an MCP client through Azure API Management to our Container App.
Our architecture will evolve from:
Internet ↓Container Apps ↓MCP Server
to:
Authenticated MCP Client ↓Microsoft Entra ID ↓OAuth Access Token ↓Azure API Management ↓Authentication + Authorization + Policy ↓Azure Container Apps ↓Meraki MCP Server ↓Meraki Dashboard API
At that point, we won’t just have a container running in Azure.
We’ll have the beginnings of a secure, governed MCP platform.
Next: Part 4 — Securing a Meraki MCP Server with Microsoft Entra ID and Azure API Management
 FreshTips