In this post I will walk through the basics of configuring Windows 10 update rings. To begin, navigate to Microsoft Endpoint Manager admin center and login with Intune administrator credentials.
Prerequisites
Before we begin, lets just run through the requirements for updates.
Quality Updates – Windows 10 version 1607 or later
Feature Updates – Windows 10 version 1703 or later
Feedback & diagnostics>Diagnostic and usage data must be set to Basic, Enhanced, or Full.
You can configure the Diagnostic and usage data manually with GPO or using device restriction profiles with Intune. This setting can be found under the Reporting and Telemetry category when creating a device restriction profile. Make sure to set the Share usage data to a setting of at least Basic.
Quality Updates
Click on Devices>Windows>Windows 10 Updates Rings>Create Profile.
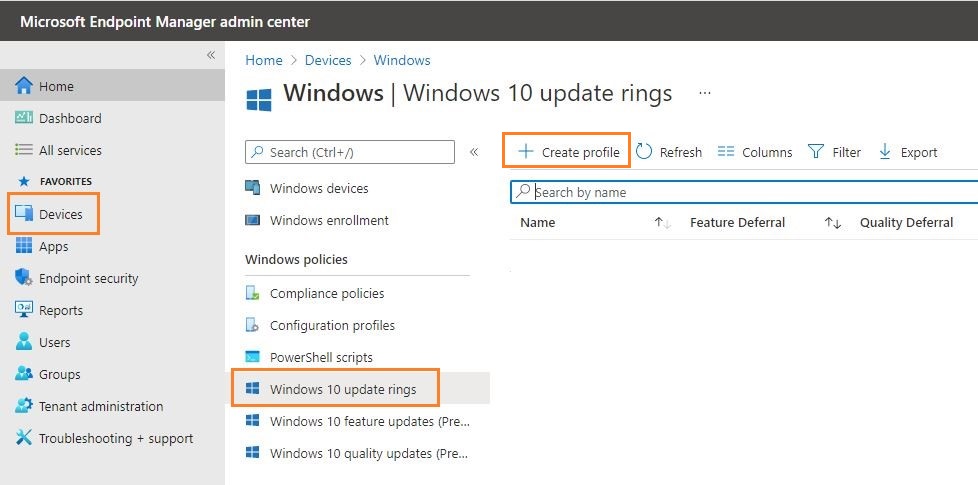
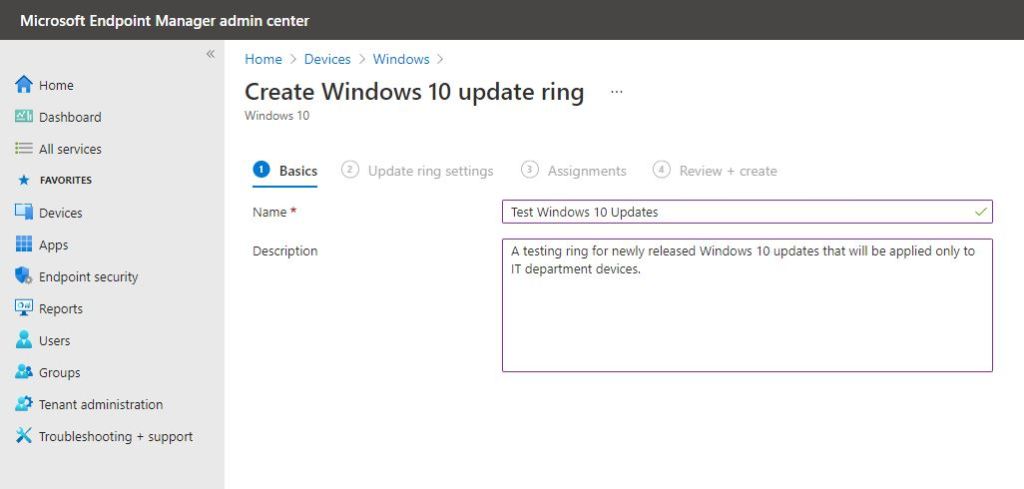
I would suggest setting up a ring for testing devices first to make sure the newly released updates are compatible with your environment and applications. Give your new update ring a name/description and click next.
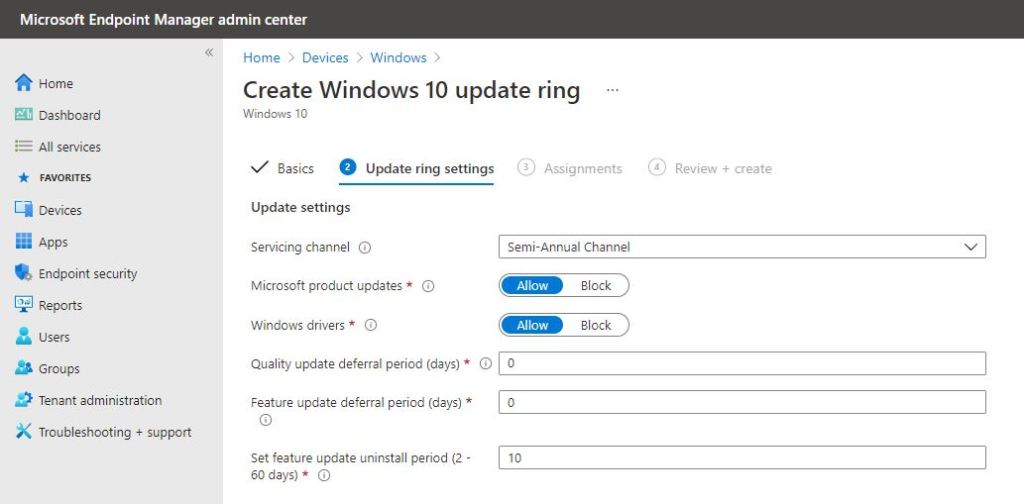
We will be choosing the Semi-Annual servicing channel so we can receive feature updates twice a year.
We will allow Microsoft product updates and Windows drivers since that is the goal of this post.
Quality update deferral period is referring to the number of days you want to wait before applying the updates that are released every month. It is normal to create multiple update rings. One update ring will be for testing the updates with a specific group of users/devices. For this ring, we will leave the deferral period to 0 since we want to apply the updates as soon as possible. For other rings such as the rest of your company employees, you can set any deferral period to your liking. We have one update ring for testing deployed to our IT department. We test the updates for a period of about 1-2 weeks. Our second ring for all employees is set for a deferral period of 14 days. If you find any issues with the updates during the testing phase, you can Pause the update ring that belongs to the rest of your employees.
Feature update deferral period is pretty much the same concept. Feature update policies are set in a different location. I will show you how to set those up later on in this post.
Setting the feature update uninstall period is also important. You can set a period from 2-60 days. Just remember that choosing a higher amount of days also means more disk space is consumed on the device.
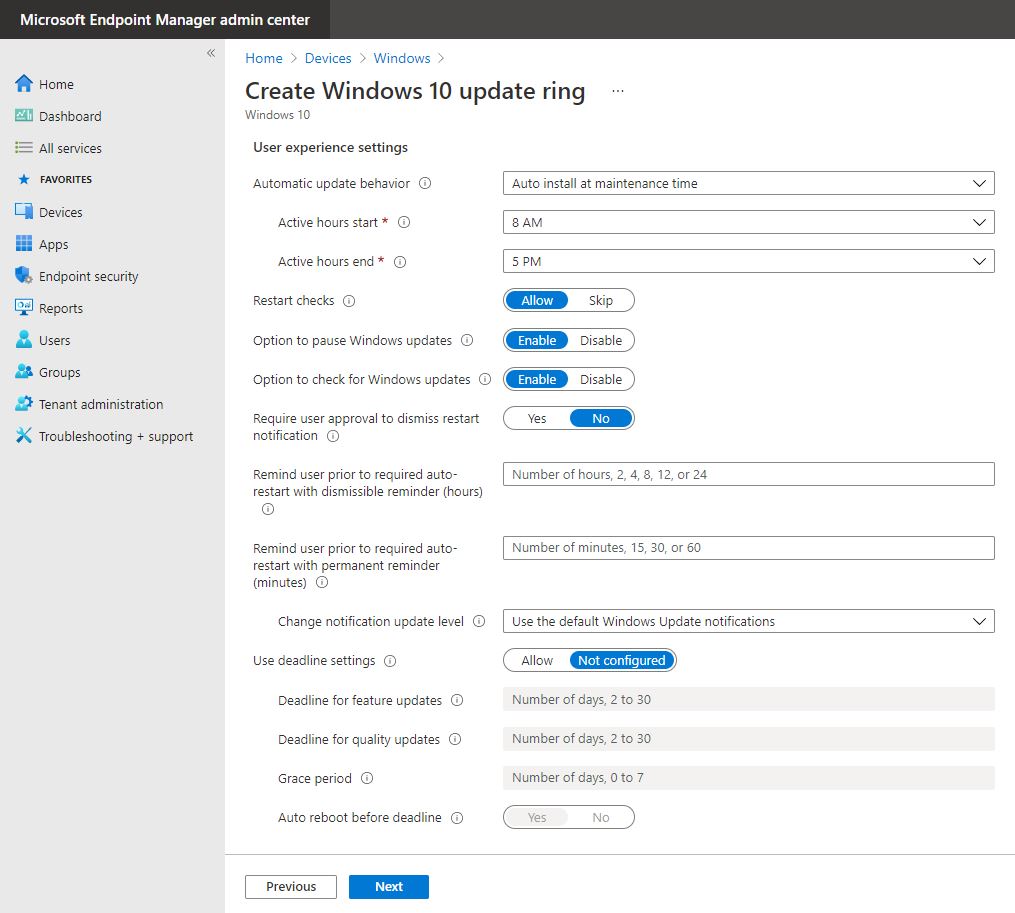
Scroll down a bit to User experience settings. You can set maintenance windows of when to install updates on user devices.
You can choose to give your users options to pause Windows updates and also check for Windows updates. I’ll go ahead and disable both of those options. The rest of the settings are pretty self explanatory. Click Next.
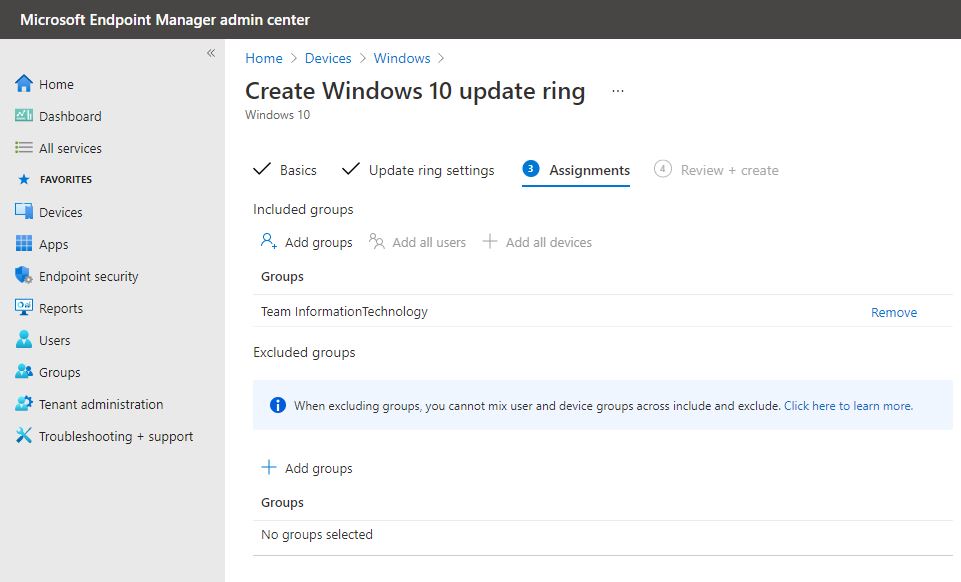
On the Assignments page you can add the groups you wish to receive the updates. Add your desired groups and click Next. On Review + Create page, verify all settings are correct and click on Create.
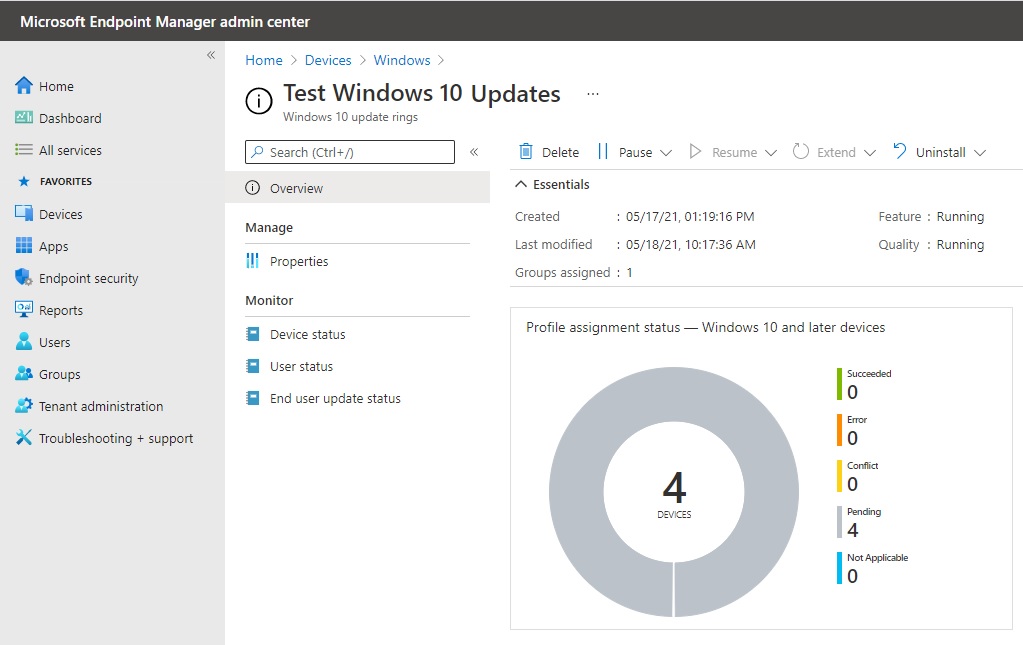
The devices normally sync with Intune every 24 hours so give it some time. You can also go directly to the devices and run a manual sync. Here you can also choose the Pause the updates and Uninstall updates. Pausing updates will pause the policy for 35 days. Once that limit is reached, the Windows devices will then again scan for any applicable updates. You can Resume and then click on Pause again and that will reset the 35 day timer. Keep in mind that devices with a pending scheduled update will probably still install the update even though you clicked on Pause. Clicking on Uninstall works a bit differently. Intune will send out the Uninstall push immediately after you click that option. The devices will be rolled back to the previously installed update if it is available.
Feature Updates
Creating a Feature update policy sets a baseline for your organization. Let’s says 21H1 has just been released but you only want your clients to use 20H2 for now. You can set that policy here. In order for Feature update policies to work properly, you should set the deferral period to 0 on the Quality updates policy. Click on Devices>Windows>Windows 10 Feature Updates>Create Profile.
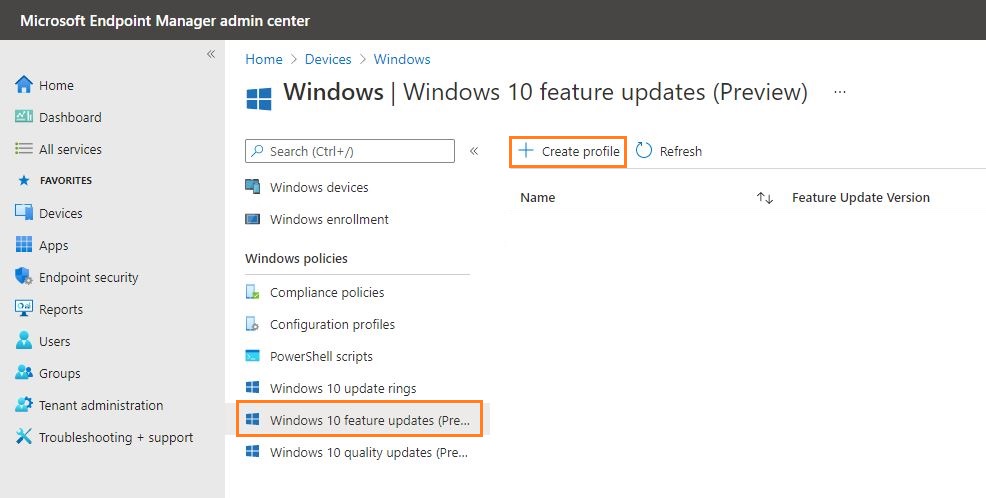
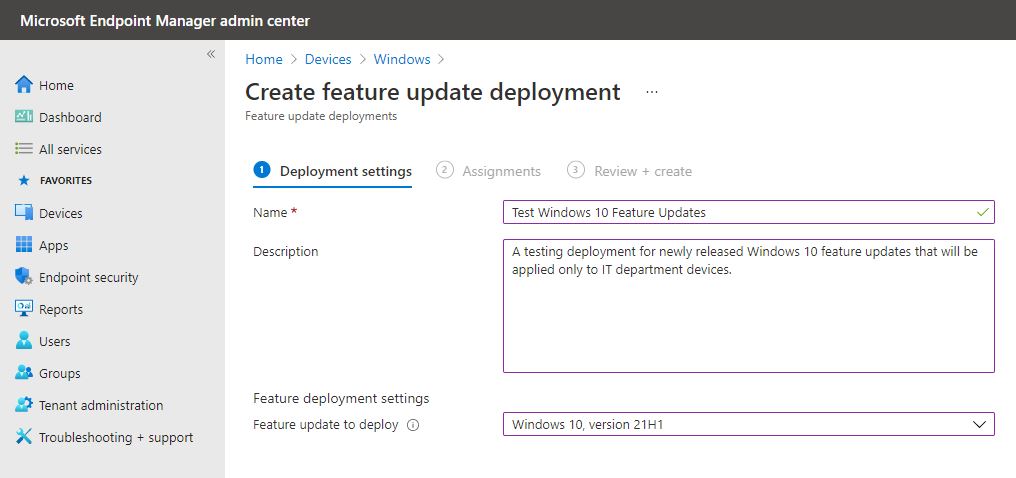
Give your feature update policy a name and description. Choose the feature update you want to deploy and click Next. It is also important to create separate policies for testing devices and the rest of your users.
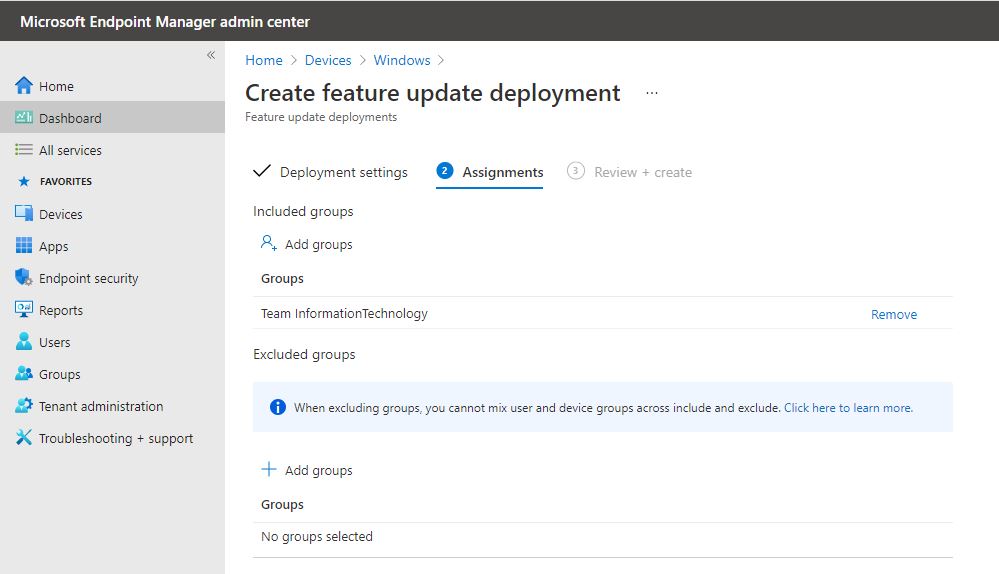
Add the groups you wish to deploy the feature updates for and click Next.
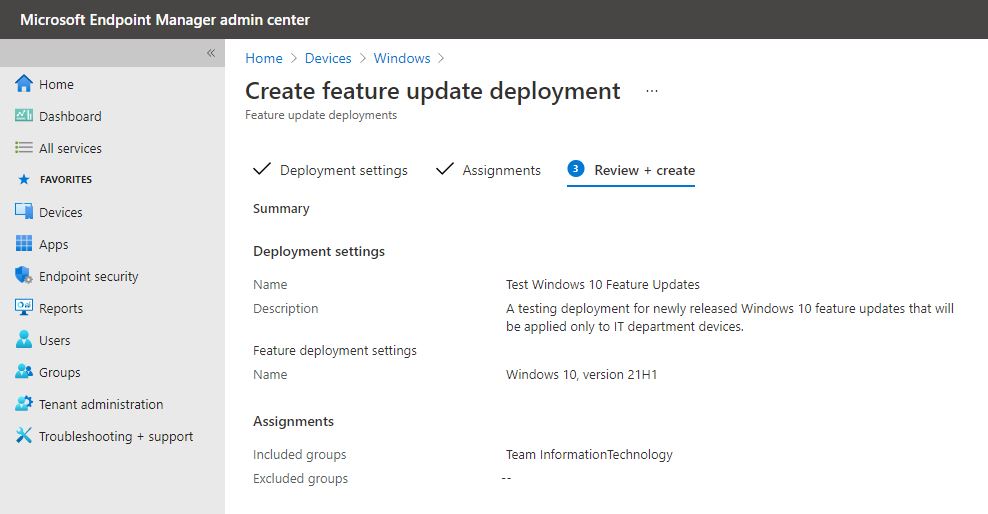
On Review + Create, verify all settings are correct and click Create.
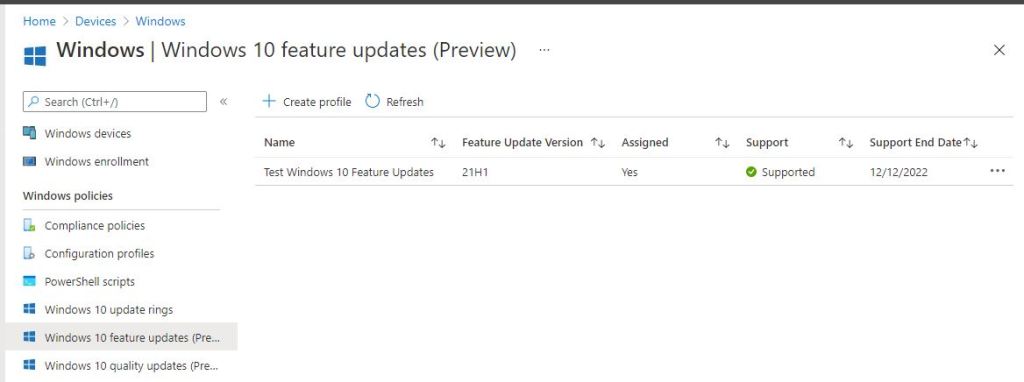
You can see the feature update is supported and shows a support end date as well.
Verify on Windows Devices
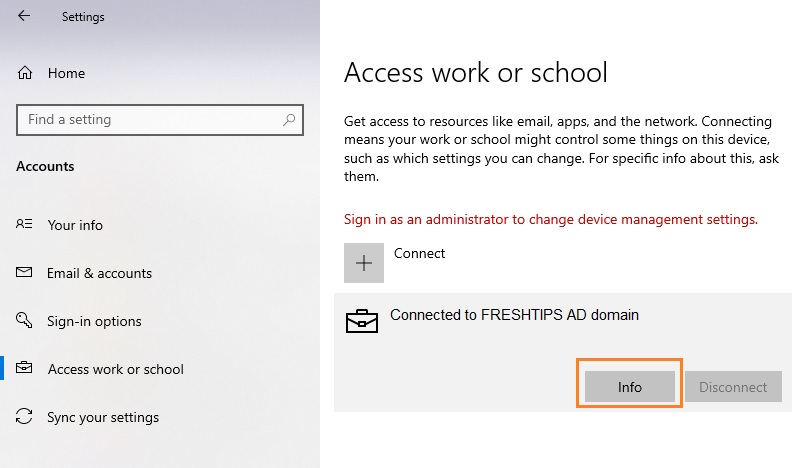
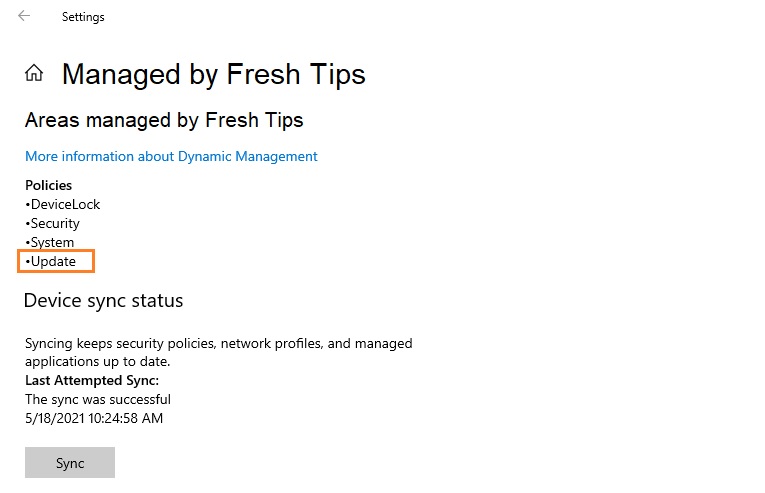
To check the policies on your Windows devices, right click on the Windows Start button and select Settings. In the Windows Settings page click on Accounts>Access work or school. Click on your organization and you should see an Info button. Click on Info to see the policies in place on this device.
As you can see, the update policy has been applied to this device.
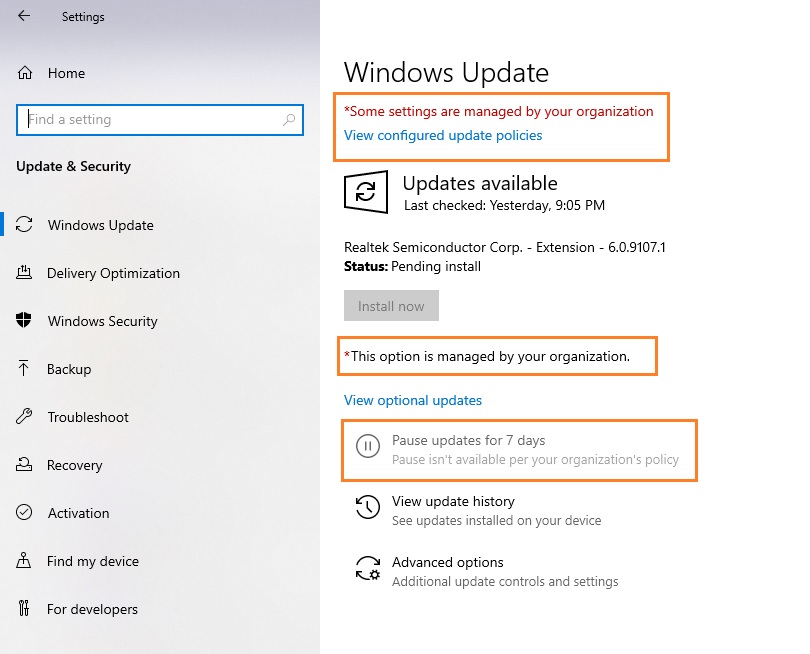
If you click on Update and Security you can see even more policies that we set. Clicking on View configured update policies shows exactly what policies are set by the Mobile Device Management platform. As you can, the Pause option and check for updates options are not available.
Co-management with Configuration Manager
If you were previously using Configuration Manager to deploy your updates and want to allow Intune to take over, you will need to setup co-management. In Configuration Manager, navigate to Administration>Overview>Cloud Services>Co-management and click on Configure co-management. Sign into your Intune organization account with an Intune administrator role. You will need to enroll your devices with Intune and allow Intune to manage the Windows update workload.
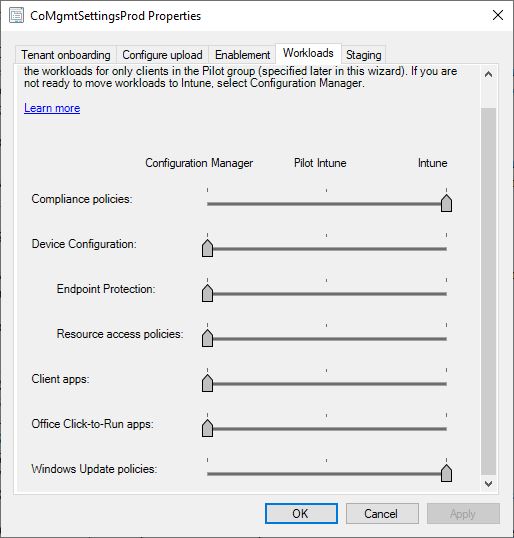
When a software update point (SUP) role is created in Configuration Manager, client devices receive a machine policy that provides the name of the software update point server and configures Specify intranet Microsoft update location local policy. Regardless of what Intune settings you implement, if there is a GPO in place for updates, the Intune settings will not work. For any GPO set with AD, you will need to remove those manually. To remove the GPO put in place by Configuration Manager, you will need to remove the SUP role. To verify you don’t have any GPO in place, open your Local Group Policy Editor by typing gpedit.msc. Navigate to Computer Configuration>Administrative Templates>Windows Components>Windows Update. Make sure all of the settings are set to Not configured.

