
In this post I will outline the steps needed to setup Exchange Connector within Service Manager when using Exchange Online as part of Office 365. Exchange Connector uses the Exchange Web Services (EWS) API to connect with Exchange Online. In previous versions of Exchange Connector, basic authentication was used to connect. According to a recent announcement, Microsoft will be disabling basic authentication access for EWS in the second half of 2021 in favor of modern authentication protocols. As a result, Microsoft has released Exchange Connector 4.1 to include support for the authentication protocol OAuth 2.0. On-premises Exchange Servers will still be able to use basic authentication for now. Since we are using Exchange Online as part of Office 365, I will also outline how to setup OAuth 2.0 in our environment.
What is Exchange Connector
System Center Service Manager Exchange Connector connects Service Manager to Exchange Server to process incoming email messages that are related to work items. After you configure Exchange Connector to monitor Exchange mailboxes, it can be used to create and update work items that are based on templates that are specified by a Service Manager administrator. Administrators can specify special keywords to search for in the incoming email messages, so that Exchange Connector can approve or reject review activities, or enable activity implementers to mark activities that are assigned to them as completed.
Requirements
Supported Operating System
Windows Server 2012 R2, Windows Server 2012, Windows Server 2016, Windows Server 2019, Windows Server 2008 R2
Supported Platforms
Microsoft System Center 2016 Service Manager, Microsoft System Center Service Manager 2019
Microsoft Exchange Server 2010 SP1, Microsoft Exchange Server 2013, Microsoft Exchange Server 2016 (With Service Manager 2016), Microsoft Office 365
Prerequisites
Files Needed
To set up the Exchange Connector, the following files are required.
• Exchange Web Services Managed API Client DLL (Microsoft.Exchange.WebServices.dll)
• Microsoft.SystemCenter.ExchangeConnector.dll
• Microsoft.Identity.Client.dll
• Microsoft.SystemCenter.ExchangeConnector.resources.dll
• ServiceManager.ExchangeConnector.mpb
- Download the above files from here: System Center Service Manager Connector 4.1 for Exchange
The System Center Service Manager – Exchange Connector 4.1 executable contains all of the files needed. The EWS API provides a .NET Framework interface to EWS in Exchange Online, Exchange Online as part of Office 365, and versions of Exchange starting with Exchange Server 2007 Service Pack 1 (SP1). By using the EWS Managed API, you can access almost all the information stored in an Office 365, Exchange Online, or Exchange Server mailbox. The current EWS version is 15.0.913.15. Starting July 18th, 2018, the EWS will no longer receive feature updates but will continue to receive security updates and other non-security updates.
Setup OAuth
As I mentioned earlier, basic authentication will be disabled so we need to setup the OAuth authentication service provided by Azure Active Directory (AAD) to allow EWS Managed API applications to access Exchange Online in Office 365. We need to register an application with AAD in order to use OAuth with Exchange Connector.
- Navigate to Azure Active Directory and login with an Azure Admin account.
- In the left-hand navigation, select App registrations under Manage.
- Click New registration and on the Register an application page, enter the following values
- Set Name to a friendly name for your app such as “SCSM Exchange Connector”
- Set Supported account types according to your scenario
- For Redirect URI, select Public client (mobile & desktop) in the drop-down and set the value to urn:ietf:wg:oauth:2.0:oob
- Click Register
- The next page will take you to the App you just created. Make sure to copy the Application (client) ID and save it, you will need this later along with the Directory (tenant) ID
- In the left-hand navigation, select API permissions and select Add a permission
- On the Request API permissions page, click on APIs my organization uses
- Search for and select Office 365 Exchange Online
- Under What type of permissions does your application require, select Delegated permissions
- Under Select permissions, select EWS.AccessAsUser.All under EWS
- Click Grant admin consent for (your organization) and accept the consent dialog
- In the left-hand navigation, select Authentication and scroll down the Advanced settings
- If it is not already enabled, click Yes for Allow public client flows
- Click Save at the top
Installation
- Run the EXE file.
- After you’ve extracted all of the Exchange Connector files from the EXE, copy the DLL files, Microsoft.SystemCenter.ExchangeConnector.dll, Microsoft.SystemCenter.ExchangeConnector.resources.dll, and Microsoft.Exchange.WebServices.dll to your Service Manager installation folder (default location is C:\Program Files\Microsoft System Center\Service Manager).
- Copy the ServiceManager.ExchangeConnector.mpb to the same location.
- Import the ServiceManager.ExchangeConnector.mpb to the management server using Service Manager admin console.
Importing the Management Pack
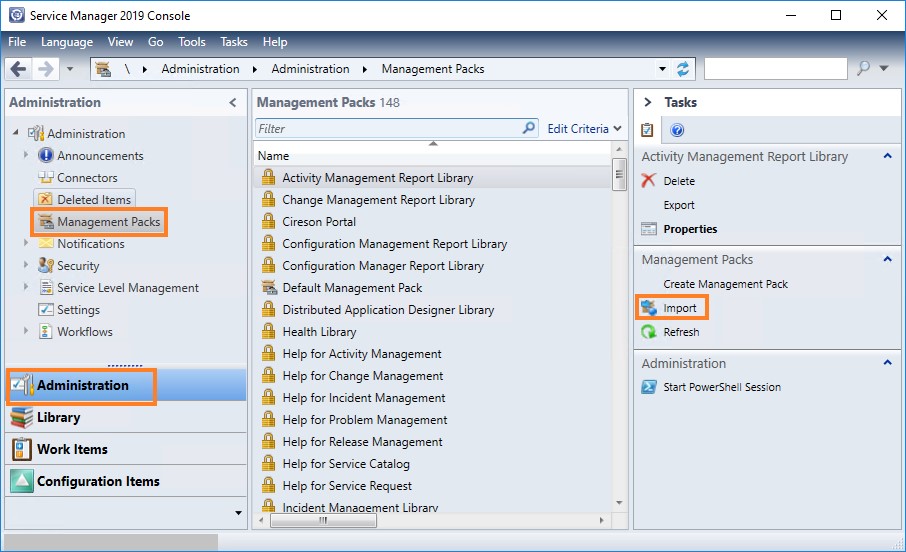
Using Service Manager admin console, navigate to Administration>Management Packs and click on Import.
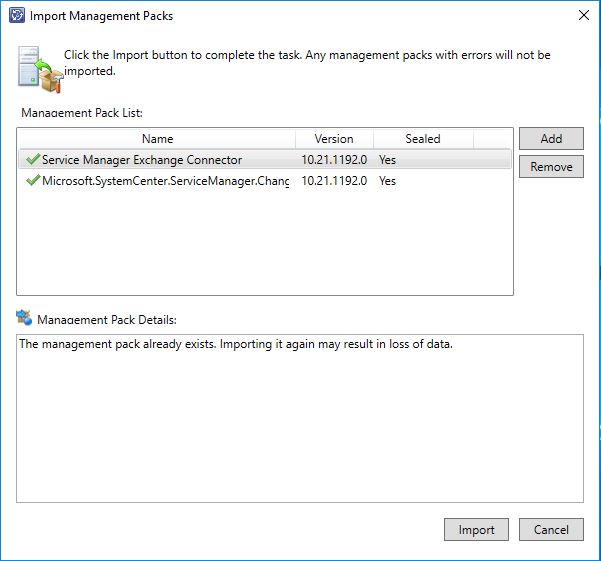
Choose the ServiceManager.ExchangeConnector.mpb and Import. This imports the following two management packs: Microsoft.SystemCenter.ExchangeConnector and Microsoft.SystemCenter.ServiceManager.ChangeRequestActionLog.
Creating the Connector
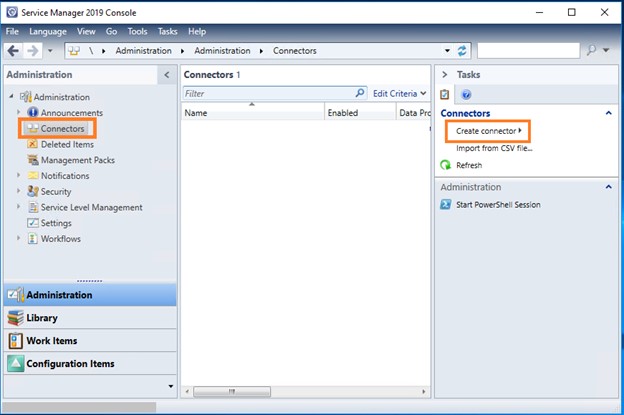
In Service Manager admin console, navigate to Administration>Connectors>Create connector and click on Exchange Connector.
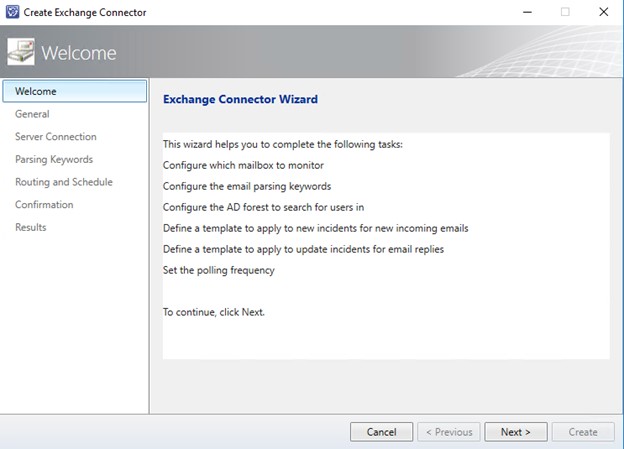
On the Welcome page, click Next.
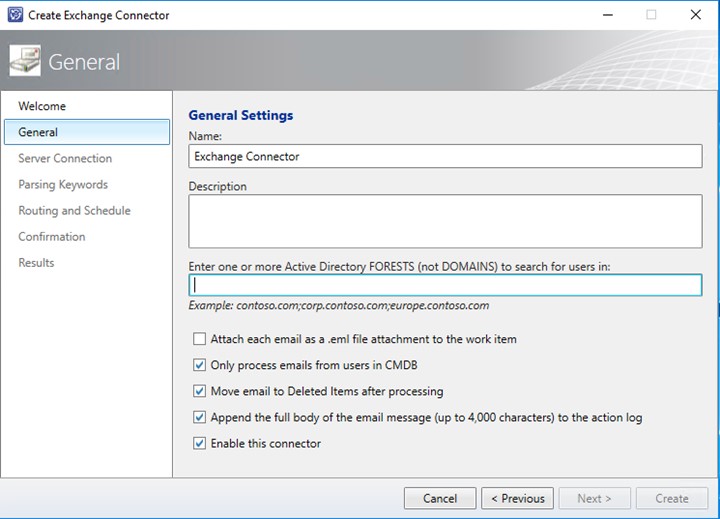
On the General page, add a name for the connector, enter your domain name, select the appropriate options and, click Next.
- If you leave Only process emails from users in CMDB unchecked, unknown senders will have their emails created into work items and the user will be added into the Service Manager database (CMDB).
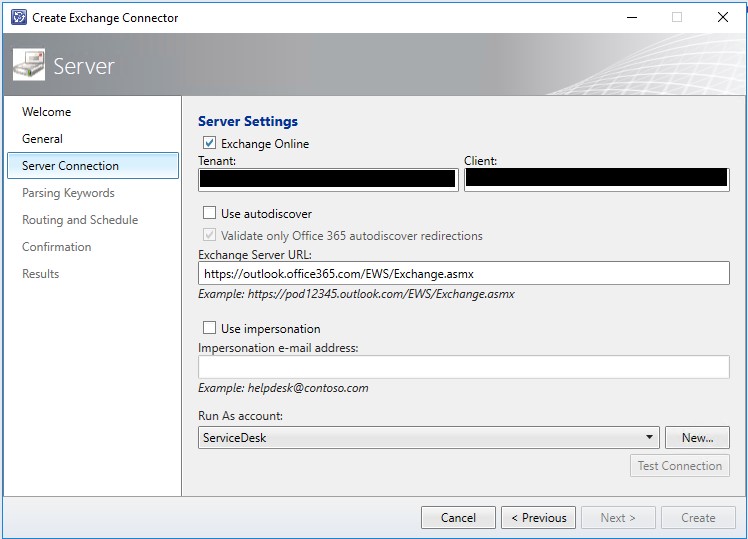
On the Server Connection page, click Exchange Online. Here you will enter the Tenant ID and Application ID that was copied earlier. Use the Exchange Server URL shown below. The Run As Account will be the Office 365 mailbox that you want the Exchange Connector to monitor. Click New. Make sure to enter the email address as the Username and enter the password to authenticate. Click Next.
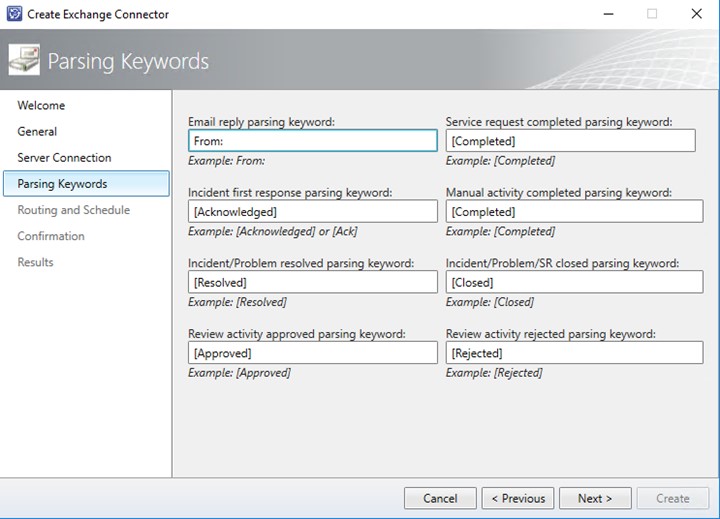
On the Parsing Keywords page, choose various keywords to look for to perform
various status and value changes such as [Resolved], [Closed], and so on. You
can use the keywords and phrases of your choice, but ensure that you choose a
string value that would not normally occur in regular email conversation by
enclosing the text in square brackets.
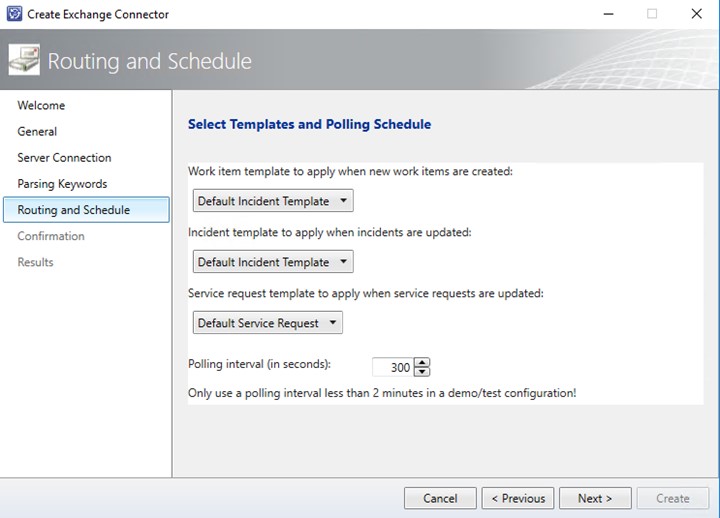
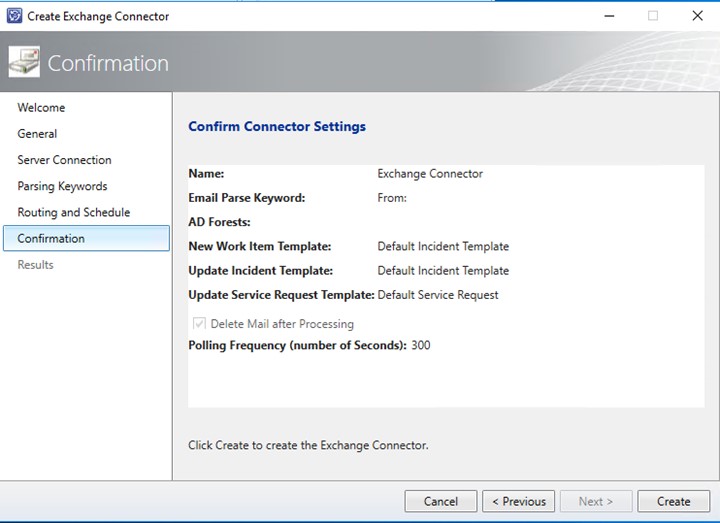
On the Routing and Schedule page, choose your templates and polling schedule then click Next.
On the Confirmation page, click Create.
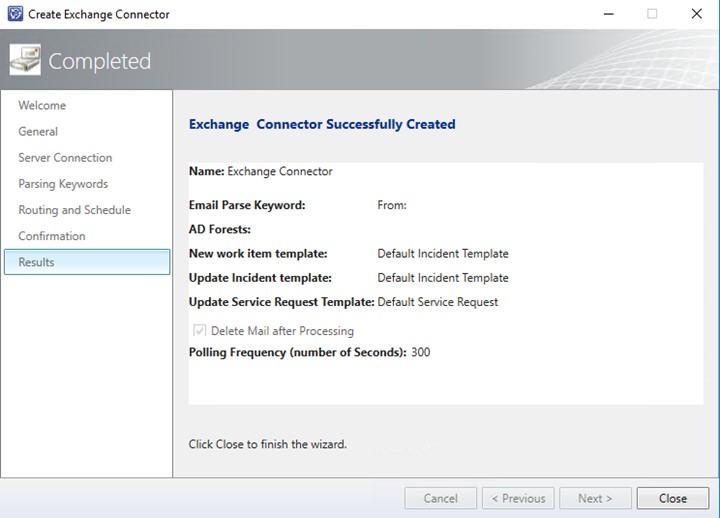
On the Completed page, click Close.
Test the Connector
To test, send an email to the Exchange Connector email address specified. It should be converted to a work item and the template should be applied. You can reply to the same email address using the newly created work item ID enclosed in square brackets to update the ticket. For example [IR245] will work but IR245 will not work. The same goes for using other values such as [resolved] and [closed].
Troubleshooting
Issue: Connector failed to validate connection
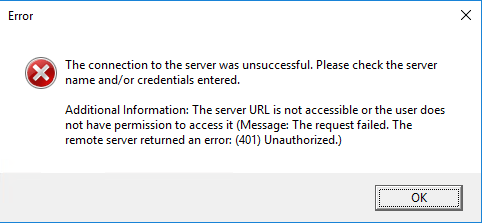
Message=The server URL is not accessible, or the user does not have permission to access it (Message: The request failed. The remote server returned an error: (401) Unauthorized.)
Resolution: Ensure the user is licensed and the mailbox is fully provisioned. If your mailbox and Run As Account are different, ensure permissions have been granted to the Run As account. Permissions include delegated access to the mailbox. If you are not using OAuth authentication and are still using basic authentication, make sure the Run As Account is excluded from any MFA policies or Legacy Authentication Blocks set in Azure. Before I tried with OAuth, I was testing using basic authentication. After adding the Run As Account to the exclusions list for both of those policies, authentication was successful.
To verify, navigate to Azure Portal>Security>Conditional Access and check each policy that is set.
Logs
Logs can be found in Event Viewer>Applications and Services Log>Operations Manager. The Source will be Exchange Connector. By default, Exchange Connector logs only error events in the event log. There are two registry values you can configure to log additional details. To do that, create the following registry key if it does not already exist:
HKEY_LOCAL_MACHINE\SOFTWARE\Microsoft\System Center Service Manager Exchange Connector
Then, create the following string values:
EnableEWSTracing
LoggingLevel
You can set the LoggingLevel value to any number from 1 to 7. The higher the number, the more
detailed and verbose the logging is. If the value is set to 0 or the value does not exist, then only
error events are created in the event log.
If EnableEWSTracing value is set to 1, the Exchange web service tracing events are logged to
the event log. If the EnableEWSTracing value is not created or if it is set to 0, the events for the 28
Exchange web service tracing are not recorded in the event log. If EnableEWSTracing is set to
1, the first set of information events shows the details of the connector operations as the
connector tries to determine which Exchange server to communicate with, based on the
Exchange Auto Discover Service configuration in AD and DNS.

