Azure Backup provides us with a specialized streaming solution for backing up SQL Server within an Azure VM. Using Azure Backup services comes with several benefits such as zero-infrastructure, central management, point-in-time recovery up to a second, long-term retention, workload aware backups (full, differential, and log), and many more. Azure Backup uses locally redundant storage (LRS) and keeps 3 copies of your data at a minimum. Additional resiliency is available with geo-redundant storage (GRS) and zone-redundant storage (ZRS). Costs include two components: the cost for each protected instance, and the cost for the amount of storage being consumed. I will not be going into the costs related to this feature so for more information on pricing, click here.
Process and Prerequisites
Backing up SQL Server on Azure VM requires us to setup a Recovery Services vault. The vault will provide us with a central location and interface to store recovery points and also perform backup and restore operations. Once we create the vault in the next section, we will need to discover existing databases and create the policy for backup. Azure Backup will install a workload backup extension named AzureBackupWindowsWorkload. This extension consists of a plugin and a coordinator. Azure Backup will create an account, NT Service\AzureWLBackupPluginSvc, to be used for backup and restore. This account requires SQL sysadmin permissions. For discovery/inquire, the NT Authority\System account is used and requires a public login on SQL. If you didn’t create the SQL Server VM in Azure Marketplace, we will get an error UserErrorSQLNoSysadminMembership. To fix this, we just need to make sure the NT Service\AzureWLBackupPluginSvc account is added in SQL logins and also given sysadmin permissions.
Creating Recovery Services Vault
We need to go to the Azure Portal and search for Backup Center or click here. Once in the Backup Center, click on +Vault and select Recovery Services vault.
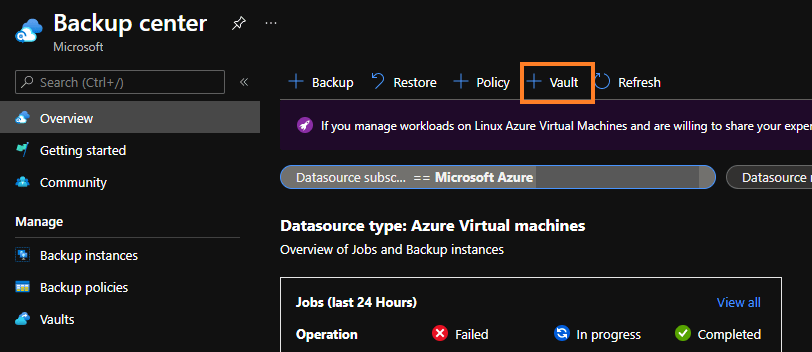
On the next screens, enter in a name for the Recovery Services vault and choose all the necessary options. Once you click on Create, it can take some time for the vault to be created. As soon as the vault is create, we can start discovering databases.
Discover Databases
Open the newly created Recovery Services vault and click on +Backup. Once you are in the Backup Goal page, select SQL Server in Azure VM in the second dropdown. Click on Start Discovery and this will install the workload services we mentioned earlier. Once the discovery is finished, you can continue to Configure Backup to setup your policies. Remember, if you come across an error, UserErrorSQLNoSysadminMembership, you just need to make sure the account NT Service\AzureWLBackupPluginSvc is added as a login for the SQL Server and has sysadmin permissions.
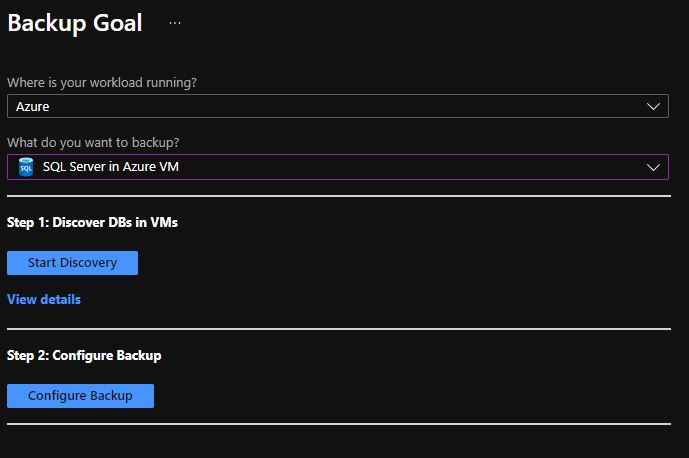
The maximum number of databases that can be protected in a single instance is 50. If you need to protect more than 50 databases, you will have to create multiple backups.
Manage and Restore
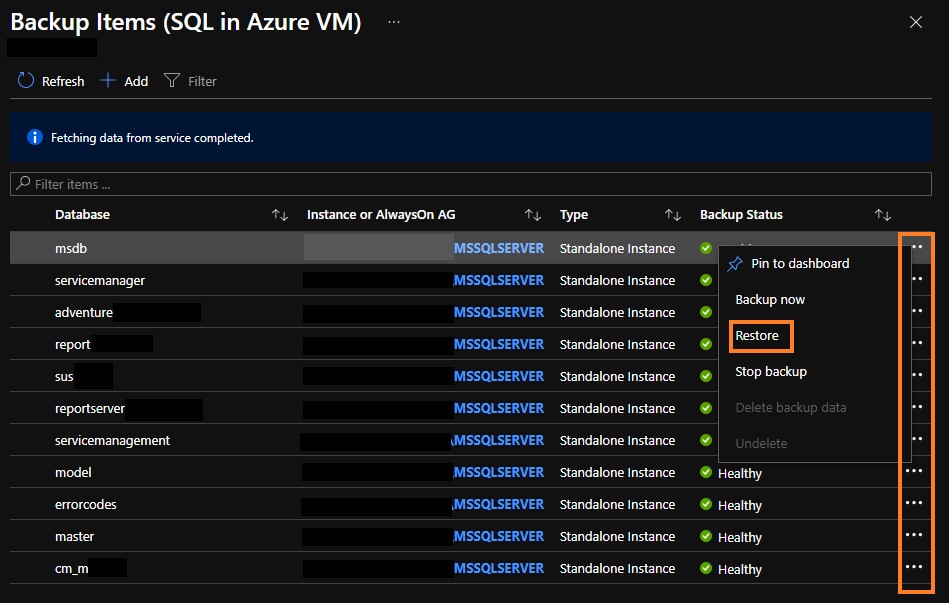
To manage the backups, scroll down to Protected items and click on Backup items. Then select SQL in Azure VM to view the databases being backed up.
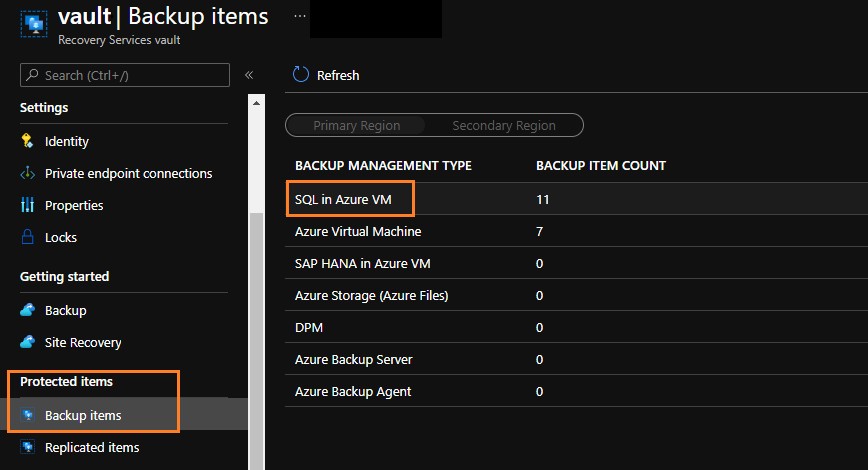
To restore from a backup, click on the menu button to the right of the database you wish to restore then click on Restore.
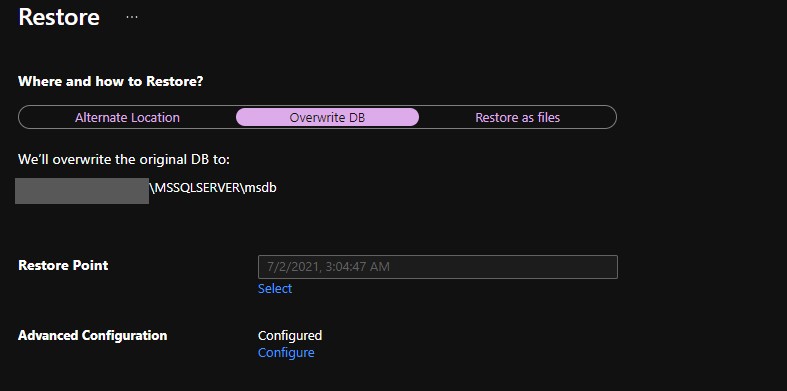
On the Restore page, you have the option to restore to an alternate location, overwrite the DB or restore as files. Choose the restore point and you are all set. After a few minutes, your database will be restored to your selected restore point.
Delete Backup
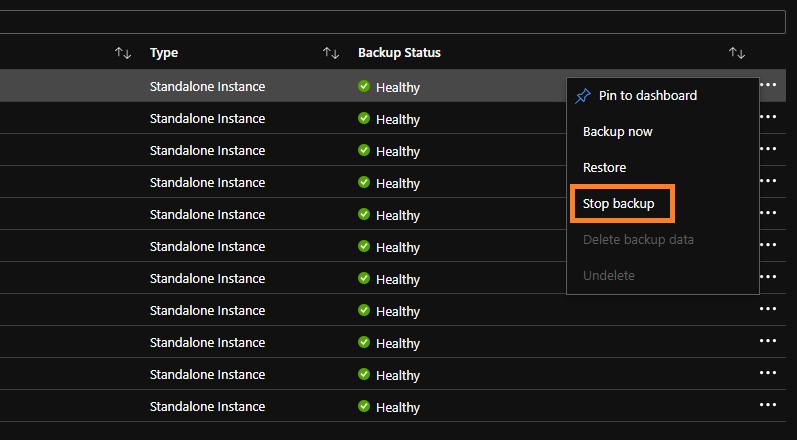
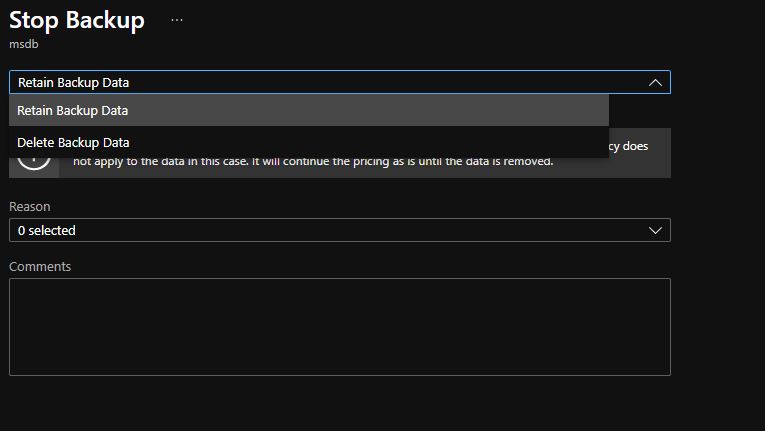
In order to delete the SQL backup policy, we need to first stop the backups of each database. When stopping a database backup, you have the option to retain the data or delete the data. Retaining the data will continue to incur storage charges of the data. Once you have stopped all of the backups associated with the policy, you can then delete the policy in place.
Summary
This is a very brief overview on how to back up your SQL Server databases using Azure Backup. If you don’t already have a back up solution in place, this is a simple and effective way to centrally manage your SQL Server backup. For more information on the entire Azure Backup process, click here.

