
Windows Remote Management (WinRM) gives administrators the ability to remotely manage a device on the internal network. By default, WinRM is enabled on all Windows Server operating systems after Server 2012, but it is not enabled on client operating systems like Windows 10, Windows 8, or Windows 7. You can enable WinRM through group policy and also through device management tools like Intune (Microsoft Endpoint Manager). But, what if you only want to enable this on demand for only one machine? To enable WinRM on specific client devices, we will need to install PsExec.
Download PsExec
PsExec is part of PsTools. You can download PsTools from Microsoft here. Once you extract PsTools, you may need to copy all of the items to the C:\Windows\System32 folder depending on PATH setitngs.
Enable WinRM Using PsExec
Open PowerShell as an administrator and type the below command:
PsExec \\ComputerName -s winrm.cmd quickconfig -q
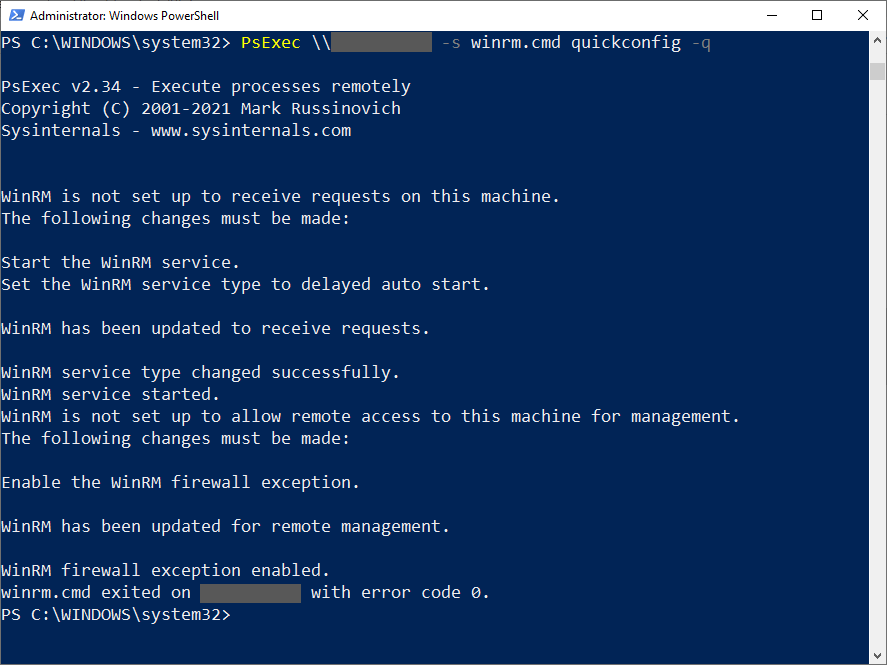
You should see the output below:
If you have multiple machines that need WinRM enabled, you can add all of the computer names in a text file and save it to your C:\ drive. To reference the text file, type the command below.
PsExec @C:\Computers.txt -s winrm.cmd quickconfig -q
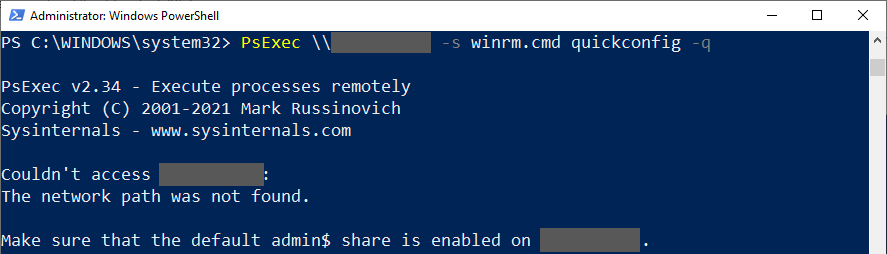
Note: File and Printer Sharing needs to be enabled in Windows Firewall on the client device. If this is not enabled, you will see the error below.
For more options on enabling WinRM, you can follow this link.

