We are all familiar with assigning licenses through the 365 admin portal for a single user, but what do we do when we need to assign licenses for dozens, or even hundreds of users? One of the ways we can achieve this is through PowerShell. In this post, I will describe how to look up the license SKUs that are available in your organization and how to assign those to your users.
Connect to Microsoft Online Service
We need to connect to the Microsoft Online Service in PowerShell so go ahead and type the commands below and login with a Global Administrator account or an account that has the User Management role.
Import-Module MSOnline
Connect-MSolService
Get Account SKU IDs
In order to assign licenses, we need to know what licenses are available to assign and how to identify them in PowerShell. Use the command below to see what licenses are available:
Get-MSolAccountSKU
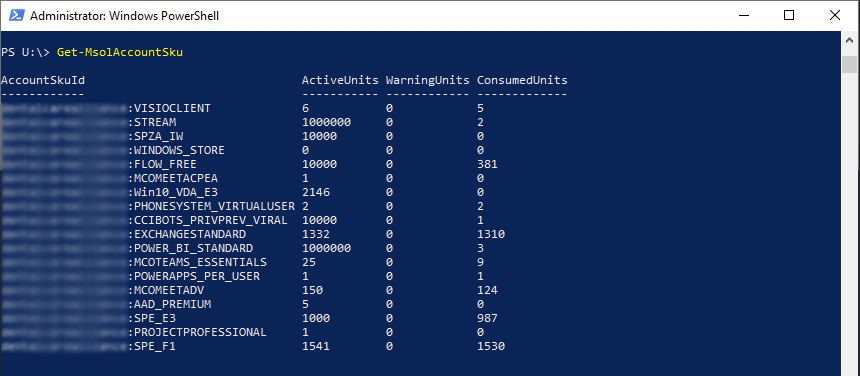
The Account SKU IDs will be listed with your tenant name followed by the license type, for example:
CompanyName:SPE_F1
CompanyName:SPE_E3
CompanyName:EXCHANGESTANDARD
Assign Licenses
Now that we know what licenses are available, we can test assigning a license to a single user so we can get familiar with the commands. The cmdlet we are using is Set-MSolUserLicense.
In order to assign a license, we need to first ensure that the usage location is set for the user, or we will get the error below:
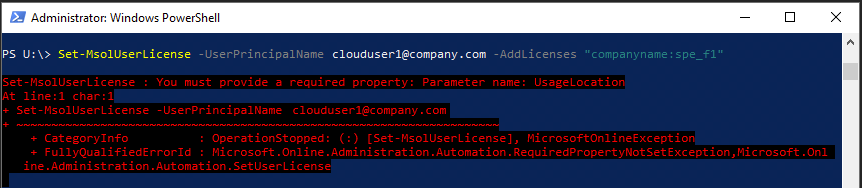
This ensures the Exchange Online mailbox is provisioned in the correct region. If you are in the United States, then the usage location will need to be set to US. For other countries, you can find the 2-letter (alpha-2) ISO code here.
You might be thinking since you are syncing your users from an on-premises Active Directory and the “c” attribute is already set to US, this will sync to Office 365. Unfortunately, the licensing piece only looks for the “msExchUsageLocation” attribute. This particular usage location is necessary to determine what features are allowed by Office 365.
There are many ways to automate this including altering AAD sync settings, but the method I will be using is to add the UsageLocation for each user with PowerShell before assigning the license. To set the Usage Location, let’s use the command below:
Set-MsolUser -UserPrincipalName clouduser1@company.com -UsageLocation US
To verify the UsageLocation was set, type the command below:
Get-MsolUser -UserPrincipalName clouduser1@company.com | Select UsageLocation
I don’t recommend this approach, but if you only operate in one country, you can set the Usage Location for all users in your organization by using the command below:
Get-MsolUser -All | Set-MsolUser -UsageLocation US
Now that the Usage Location is set, we can test adding a license. Use the command below to add the license:
Set-MsolUserLicense -UserPrincipalName clouduser1@company.com -AddLicenses "companyname:spe_f1"
You can verify the license was assigned by checking the 365 admin portal or the PowerShell command below:
Get-MsolUser -UserPrincipalName clouduser1@company.com | Select IsLicensed, Licenses

Now that we know the basics, let’s build a script that will read from a CSV list of users.
The CSV file will have three columns consisting of a users’ User Principal Name, Usage Location, and the license you wish to assign. Take a look at the example below:
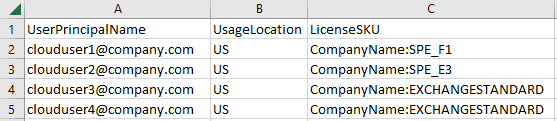
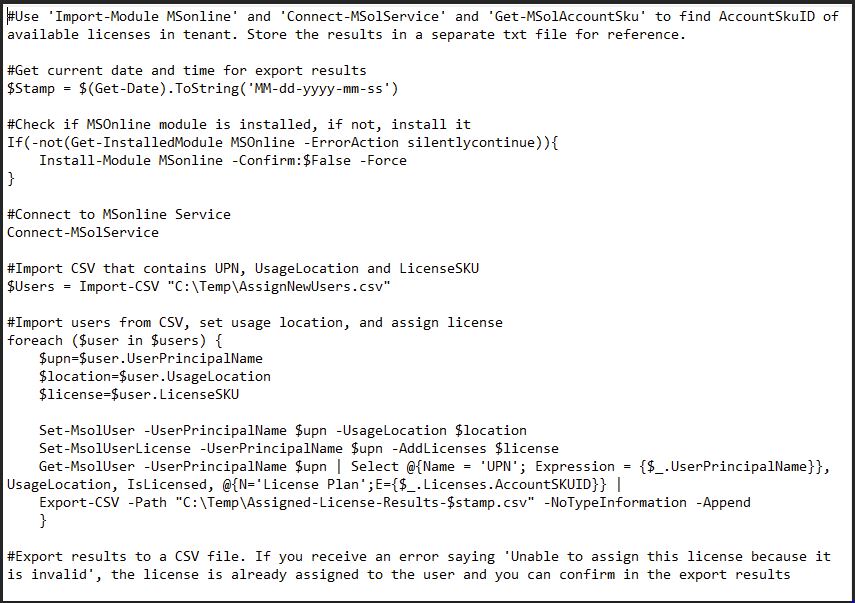
Here is the script in full that I use. I have also included a section that will export the results to a separate CSV file. You will need to alter it some to match your organization and path.