I was recently asked by a department to setup a daily sync of an on-premises file share to a SharePoint Online site. My first thought was, why not just use the SharePoint site one hundred percent of the time and eliminate any future sync issues from the on-premises file share. Long story short, there is a SQL export that occurs, and a CSV file is saved to the file share. Unfortunately, having the export upload directly to the SharePoint online site is not a possibility at the moment. This isn’t something I recommend doing and always encourage to remove any dependency of on-premises file shares. I put this in place only as a temporary solution and will be working with our database administrator for a better process.
Now, I understand there may be many possible ways to explore and implement this. The way I went about making this process work was to have OneDrive for Business sync the file share directly to the SharePoint online site. OneDrive only syncs when a user is logged in, so I also had to use Task Scheduler to run OneDrive sync periodically. Let’s walk through the steps.
Prerequisites
It’s recommended to use a service account that has permissions to the on-premises file share and the SharePoint site as well. You will also need to make sure the user account is a local administrator on the machine.
The service account being used will also need Log on as batch job rights since Task Scheduler is a batch-queue tool.
OneDrive installs per-user to AppData so if the user account already has OneDrive installed I also recommend uninstalling any previous versions of OneDrive for the user account
Install and Configure OneDrive
Login to the machine with the user account you wish to have OneDrive running as
Open a browser and navigate to the SharePoint site and folder you wish the sync with
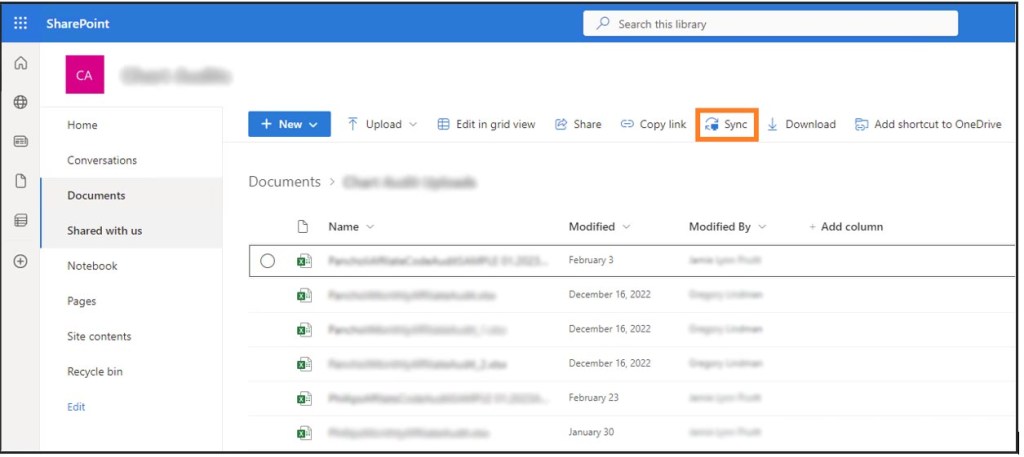
Click the Sync button
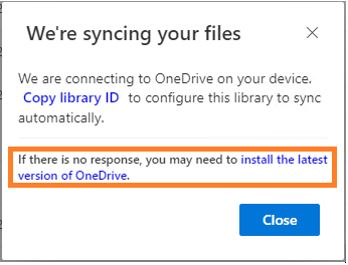
If OneDrive is not installed, click install the latest version of OneDrive.
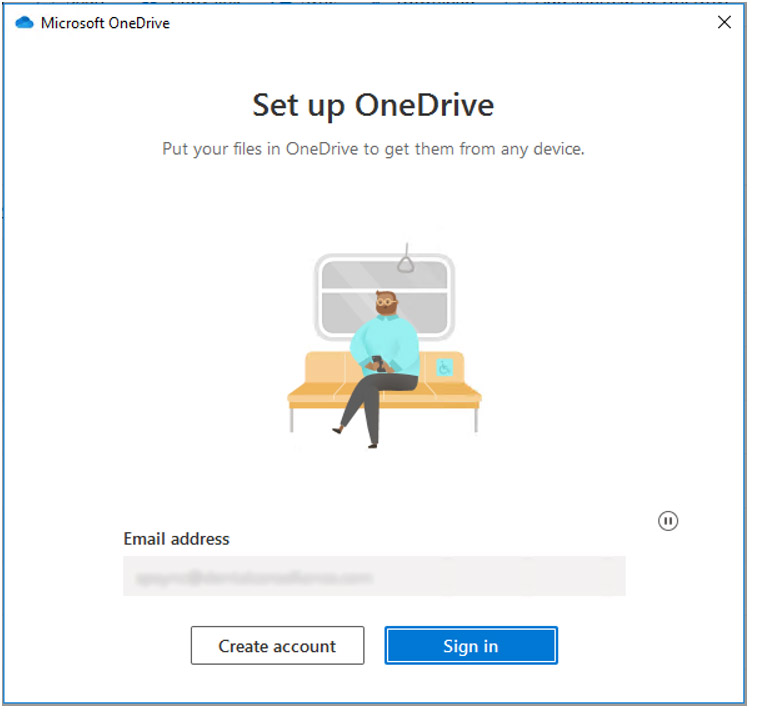
Once the OneDrive installation is complete, click the Sync button again and sign in to OneDrive with the service account
Once logged in, change the folder path to the location you wish to sync and click Next
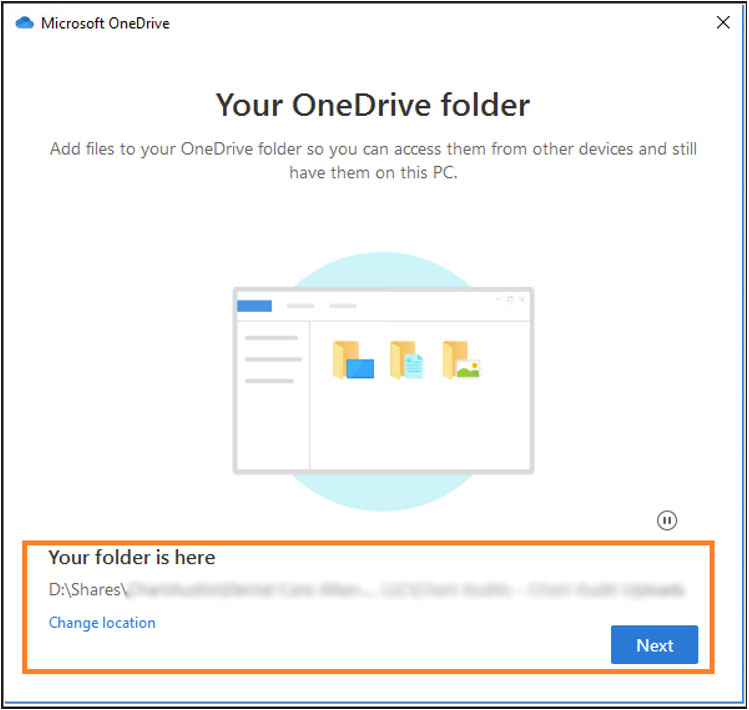
Click Next
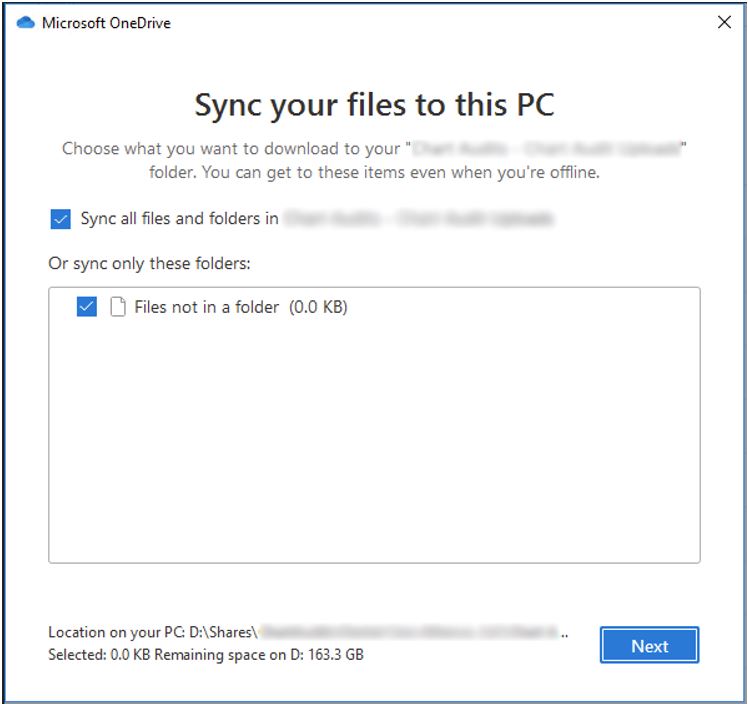
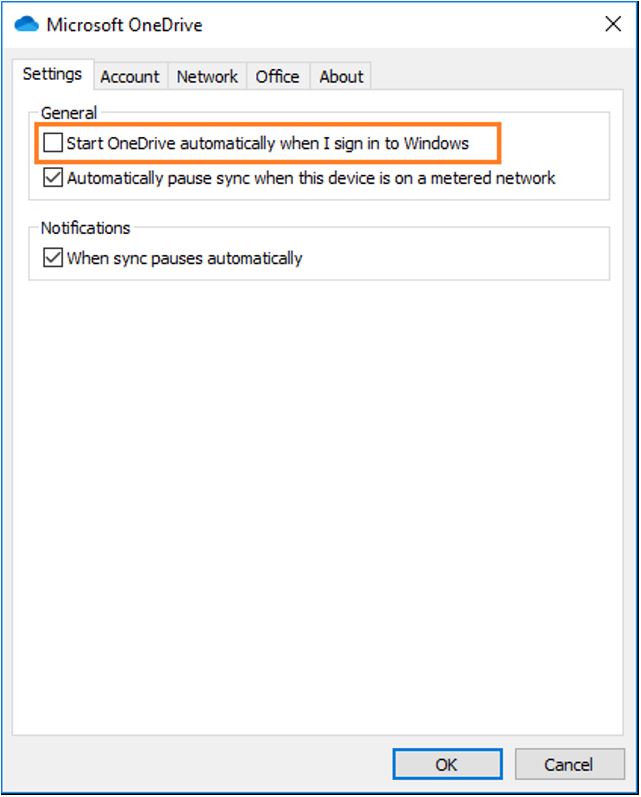
Once you verify all files are syncing properly, we need to disable the AutoStart feature in OneDrive
Open OneDrive Settings and click on the Settings tab
Uncheck the box next to Start OneDrive automatically when I sign in to Windows
Create Task in Task Scheduler
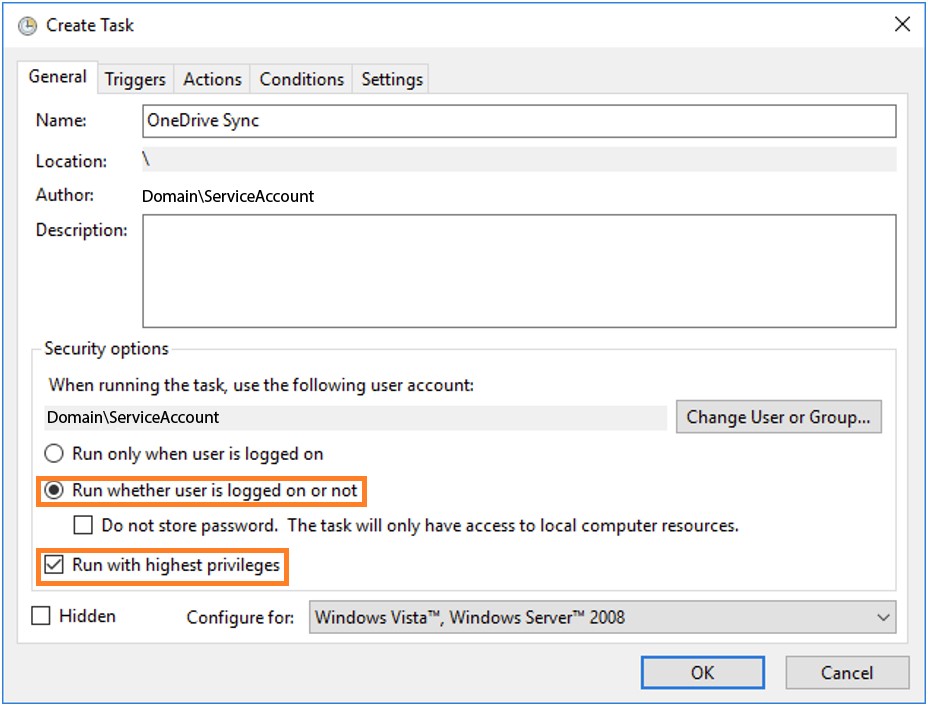
Launch Task Scheduler and click Create Task
Give the task a name and make sure to select Run whether user is logged on or not. Also, select Run with highest privileges
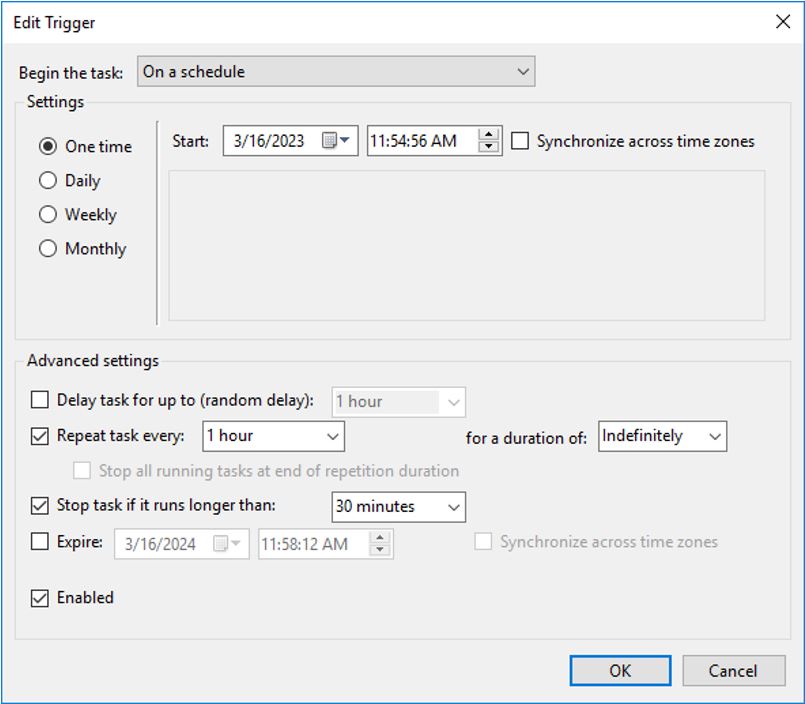
Navigate to the Triggers tab and click New
Make sure to match the settings below and click OK
Navigate to the Actions tab and click New
Click Browse and navigate to the location of OneDrive.exe:
C:\Users\USERPROFILE\AppData\Local\Microsoft\OneDrive\OneDrive.exe
Click OK

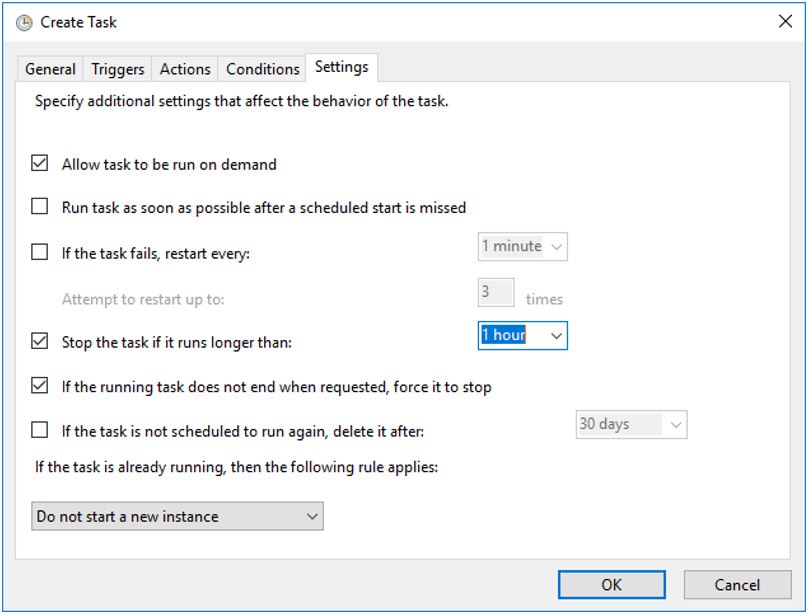
Navigate to the Settings tab and match the settings below
Enter the user password if prompted
Task Scheduler is a batch-queue tool and accounts that use this tool will need the Log on as a batch job user rights.
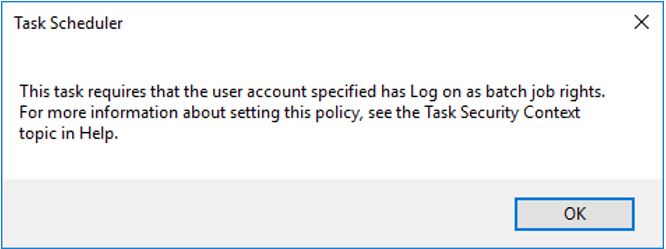
This policy setting can be found here: Computer Configuration>Windows Settings>Security Settings>Local Policies>User Rights Assignment>Log on as a batch job

